Funeral Custom Design Editor – Helpful Tutorials
We recommend spending some time reading through our guides below to get a good understanding of how to use our custom design editor. Although the tool is fairly intuitive and easy to use we understand that some people are less tech-savvy than others so we have created these tutorials to help.
An order of service booklet is an important part of paying respect to the departed so achieving the best possible result is something we would encourage.
If you need any help with our editor or designing your prints in general then please contact us and we will be happy to help.
For useful tips on how to design an order of service booklet and how to write a meaningful eulogy please consider reading some of our helpful articles.
Text
- How to add and remove text.
- How to edit text.
- How to change the font.
- How to change the text colour.
- Add a stroke or shadow to text.
- Text size, line spacing, and letter spacing.
- How to align text in it’s own box.
- How to align text within the page.
- Curved Text.
- Change text to bold, italic, underline, or all caps.
- How To Rotate Text
Images
Frames/Borders
Designs
Layouts
Layers
Undo & Redo
Saving Your Design
Finished Design
Text
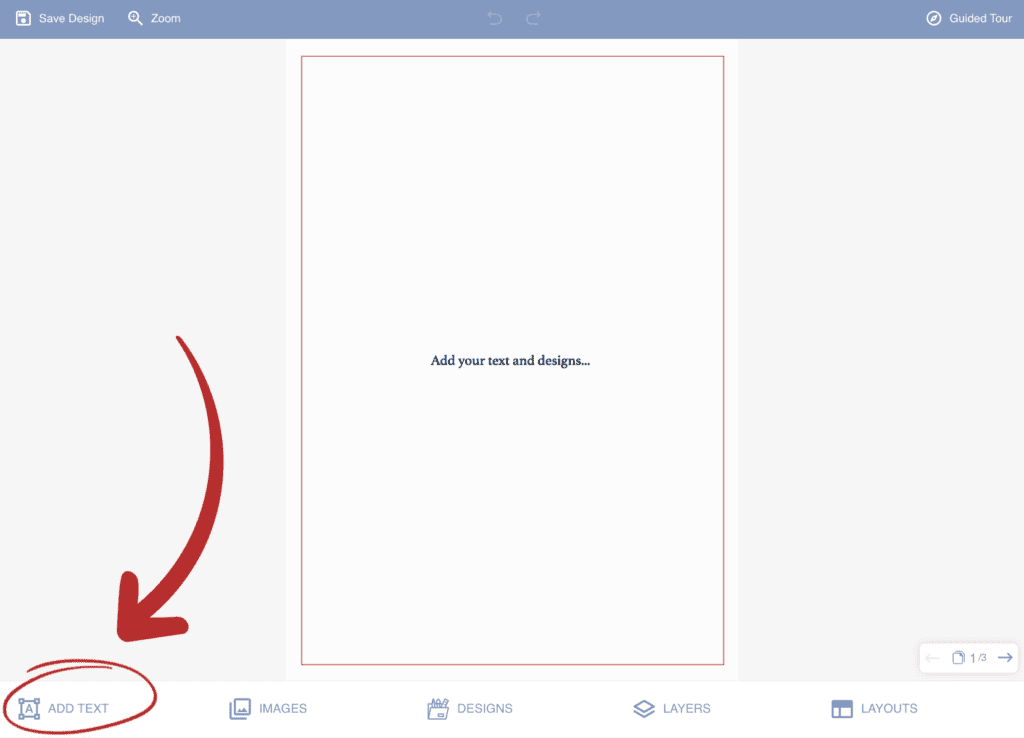
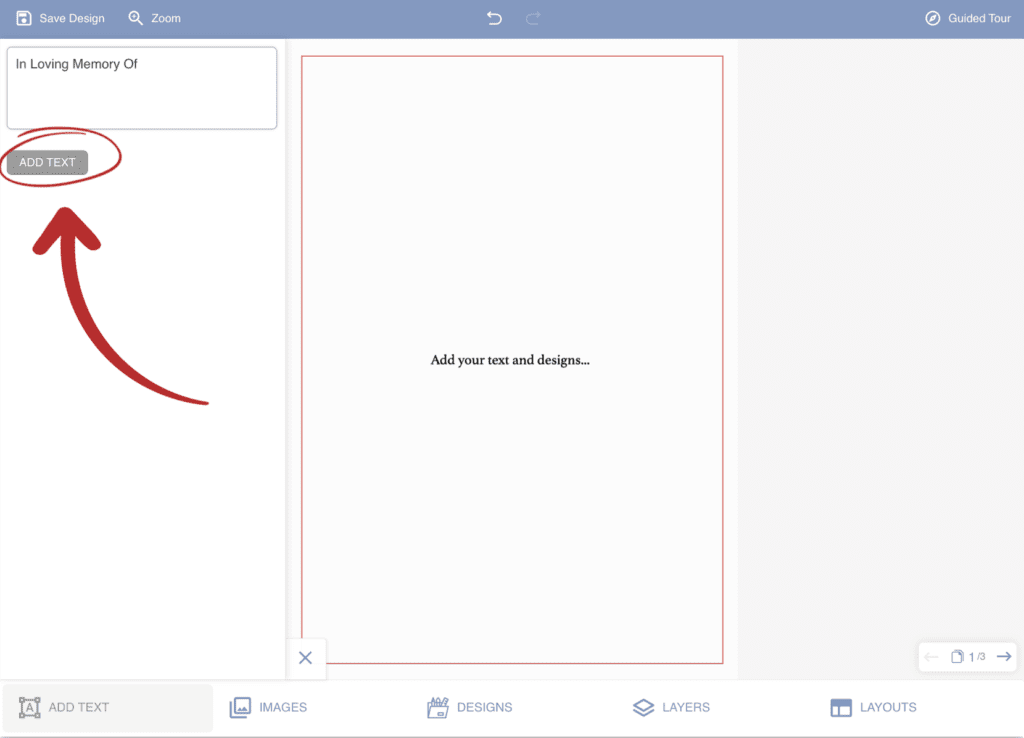
How To Add Text
To add text click on the ‘Add Text’ option on the toolbar across the bottom of the designer. A text box will appear in the top left where you can enter your custom text. After you have added your text click on ‘Add Text’ and your text will appear on the main canvas.
How To Remove Text
Click on the text you want to remove and then select the dustbin icon from the dropdown box.

How To Edit Text
To edit text you have already added to the canvas click on the text you want to change to select the element, then click again and you will see a blinking curser that will allow you to edit or add more text.
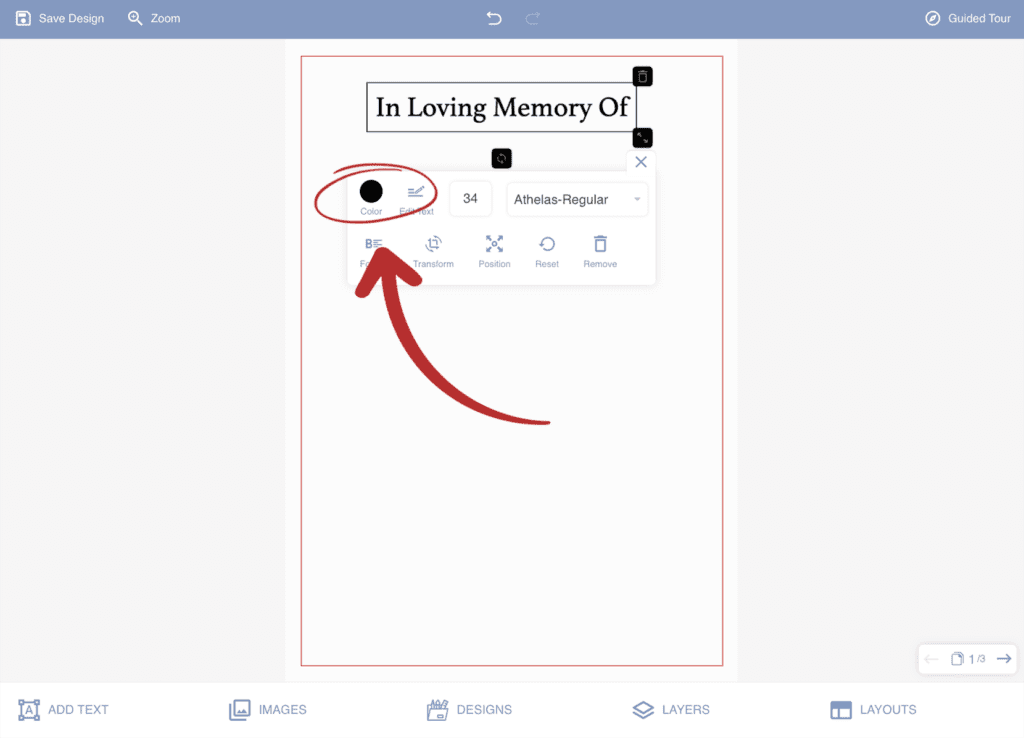
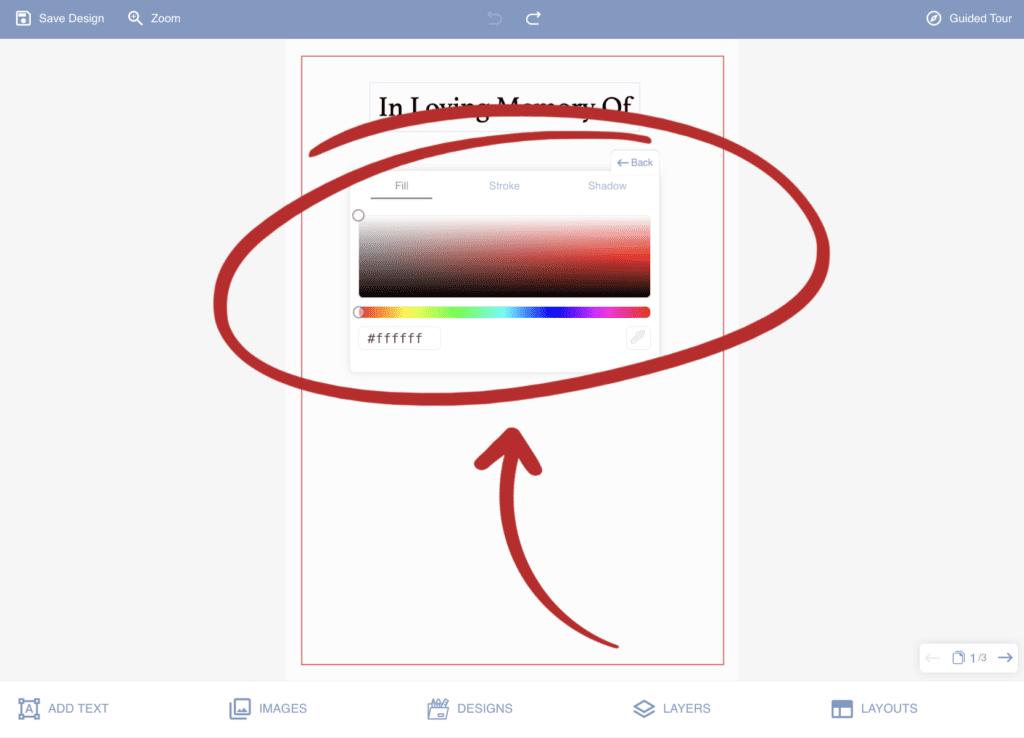
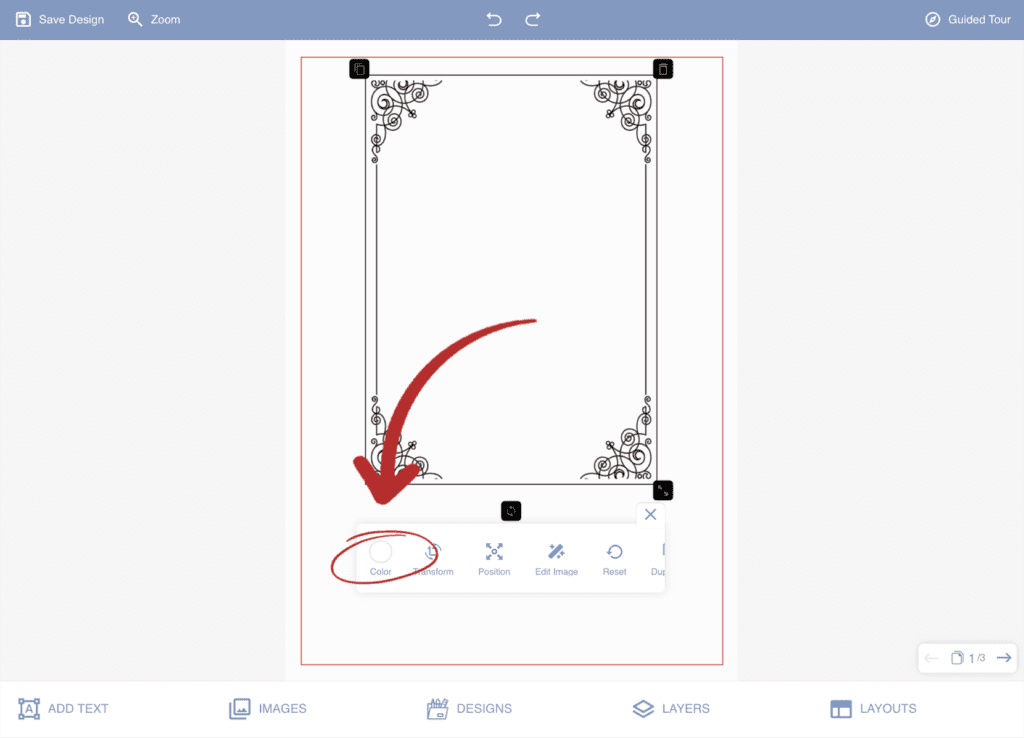
How To Change Text Colour
To change the colour of your text first click on the text you want the change. Then select the ‘Colour’ option from the dropdown box. From there you can select a colour with the colour picker or enter a hex value.
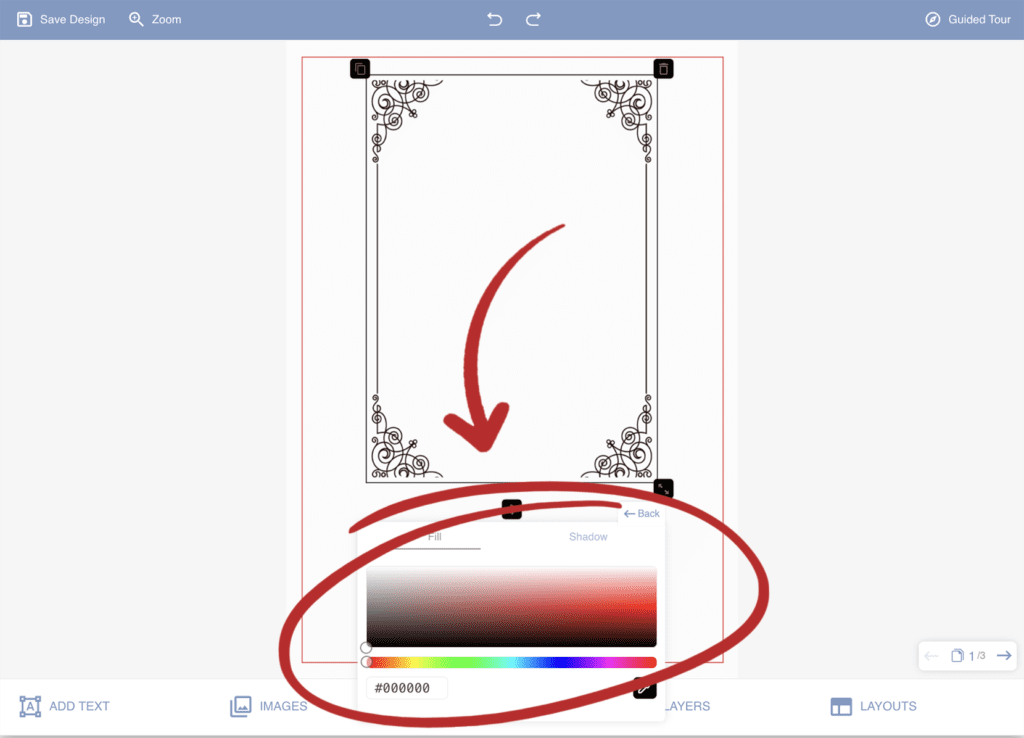
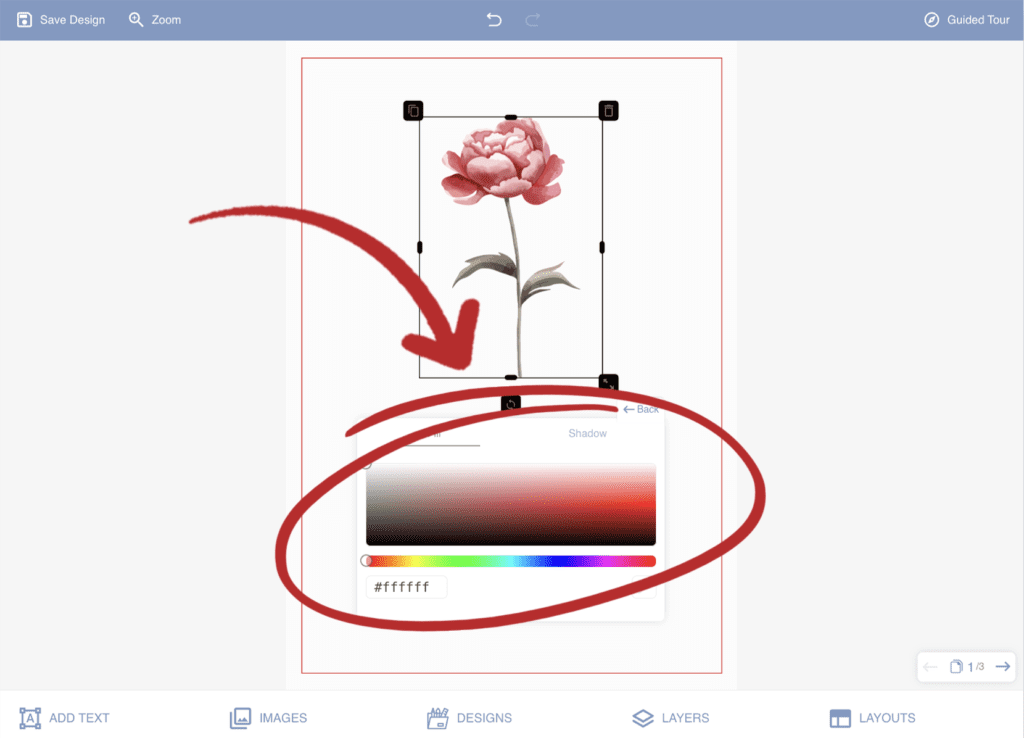
How To Add A Stroke Or Shadow
To add a stroke or shadow to your text first click on the text you want to change. Then select the ‘Colour’ option from the dropdown box. From there and can select the ‘Stroke’ or ‘Fill’ option from the top of the colour dropdown box and either select the colour using the colour picker or enter a hex value.
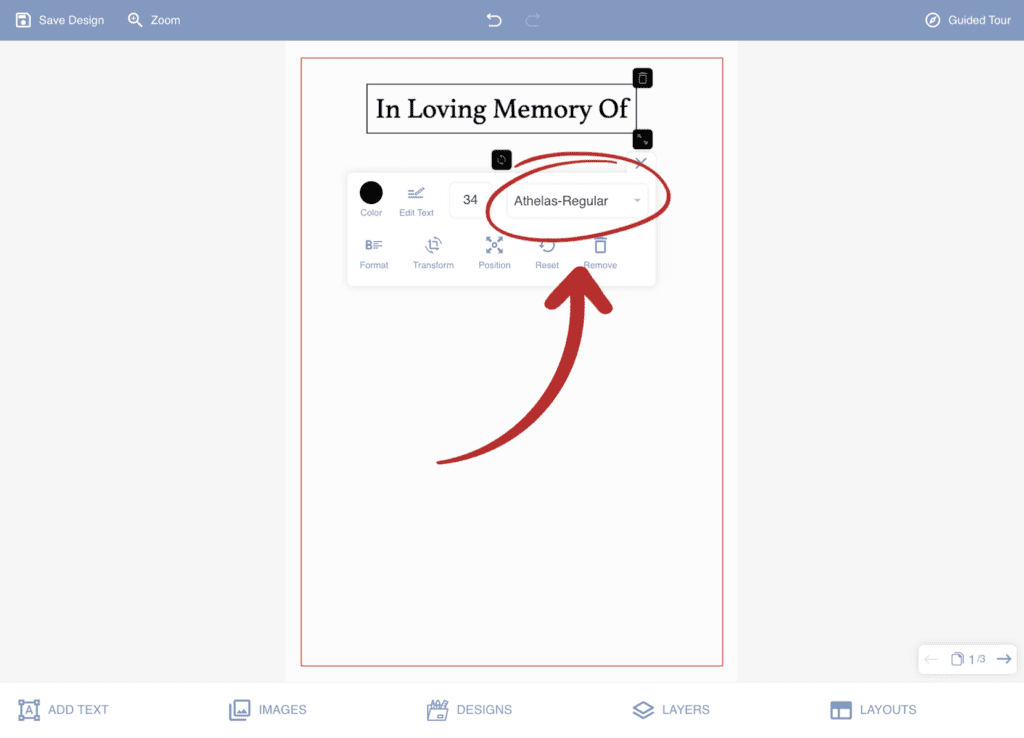
How To Change The Text Font
Click on the text that you want to change the font of then select the fonts list from the dropdown box. You can then scroll through the list of fonts available and choose the one you like.
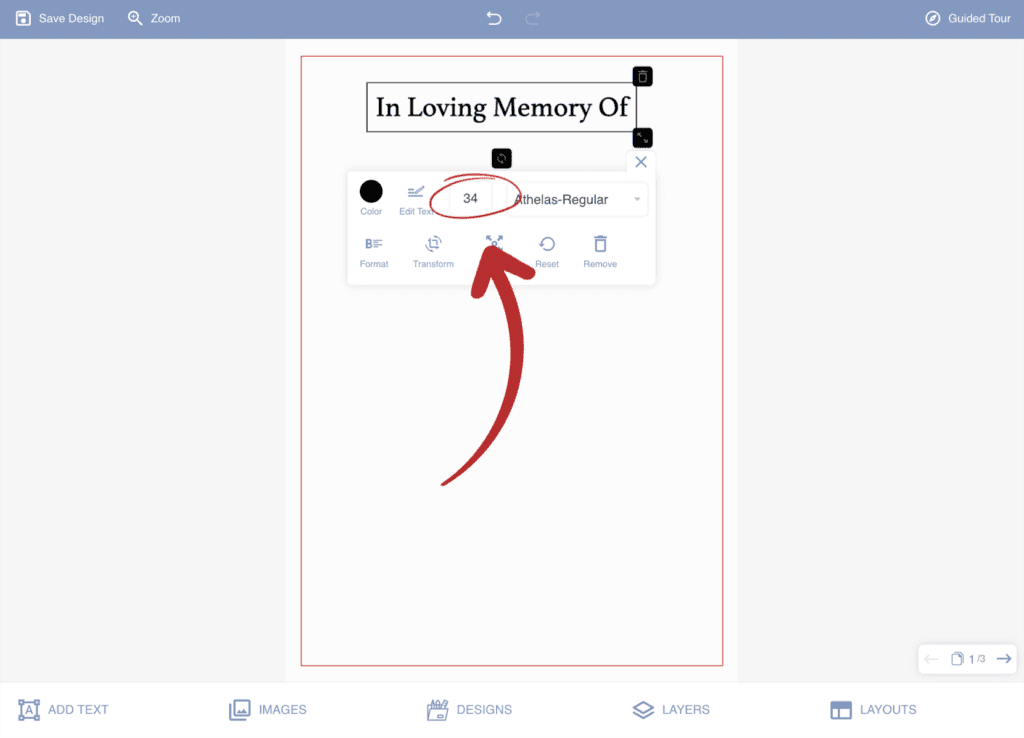
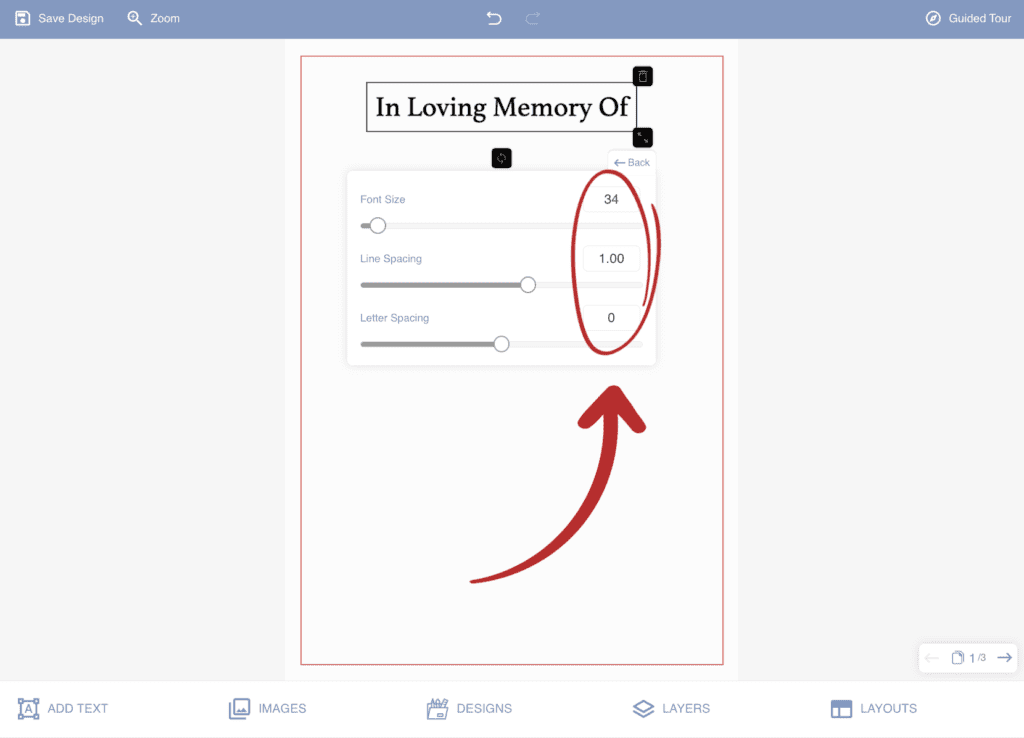
Text Size, Line Spacing, And Letter Spacing
To change either the size of the text, the line spacing or the spacing between letters, first click on the text you want to change. Then click on the text size option from the dropdown box. From there you can change the size of the text, the space between lines and the space between each individual letter.
How To Align Text Within It’s Own Box
To align your text in it’s own box either left, right, or center first click on the text you want to align. Then select the ‘Format’ option from the dropdown box. From there you can select either left align, right align, or center align.

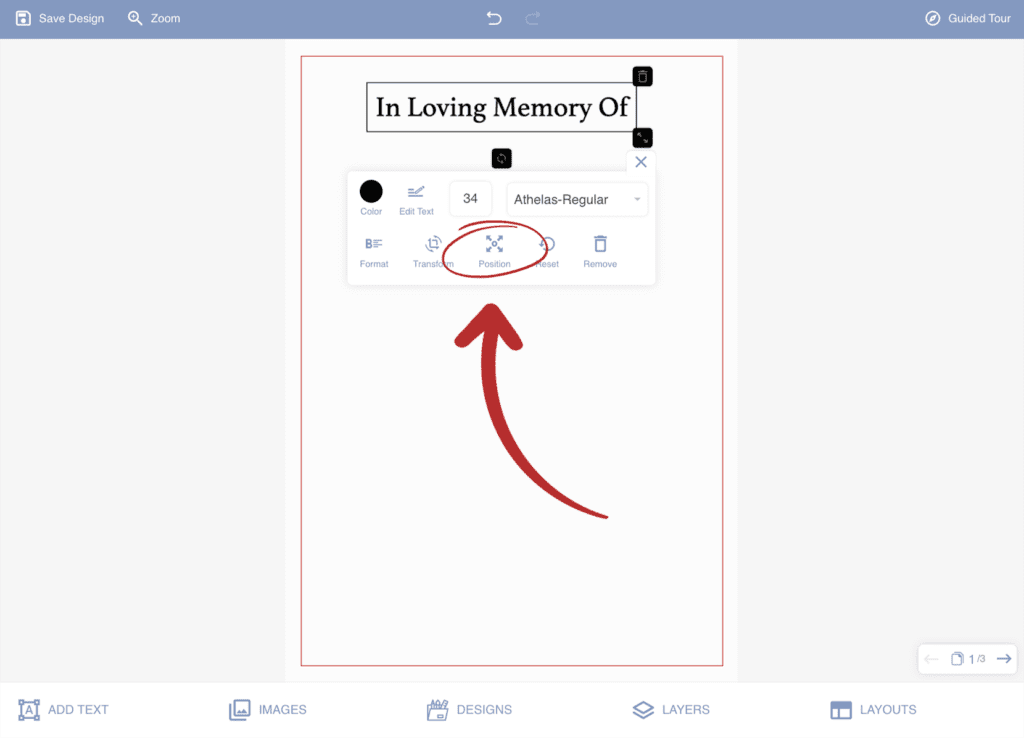
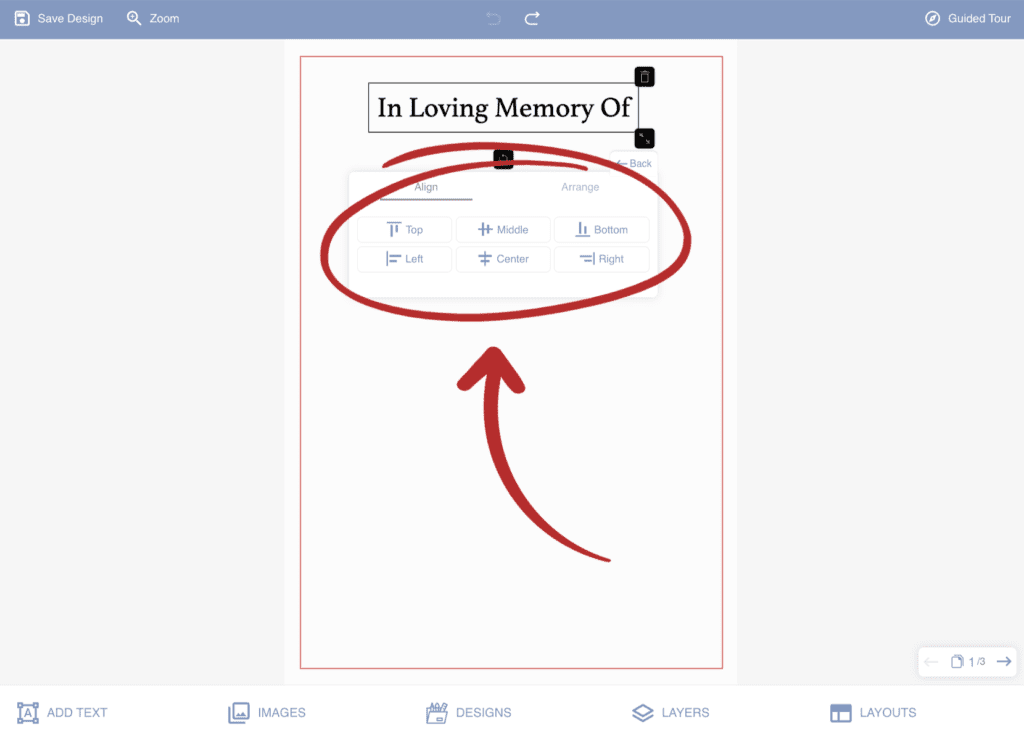
How To Align Text Within The Page
To align text within the page first click on the text you want to align. Then select the ‘Position’ option from the dropdown box. You can then choose to align your text on the left, right, top, bottom, center, or middle of the page.
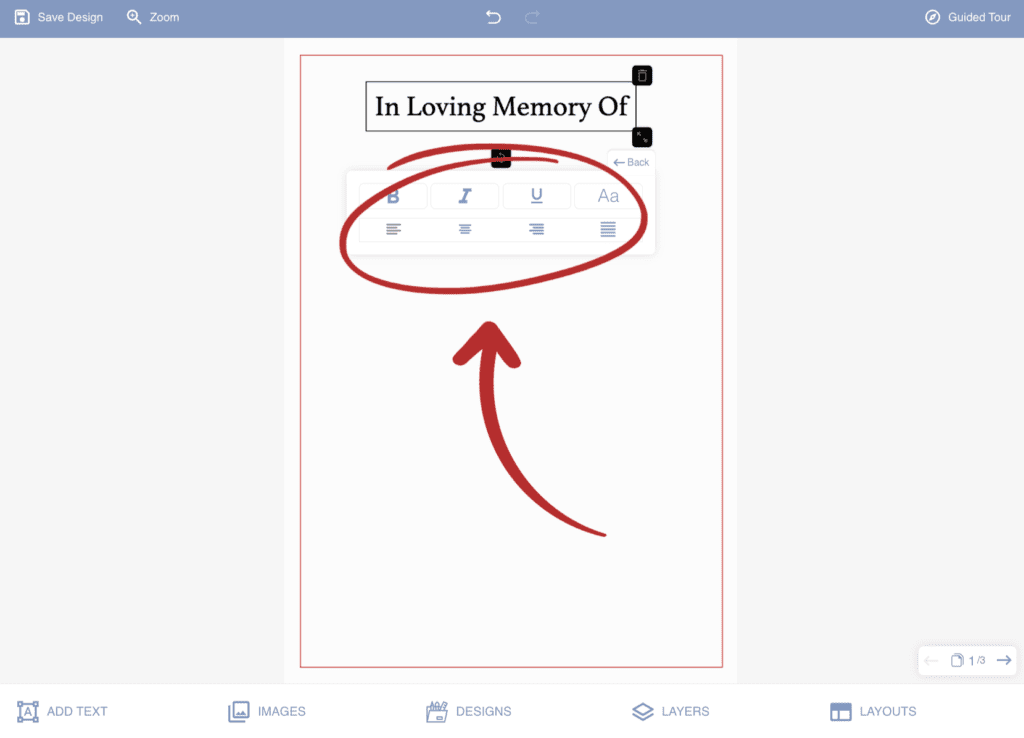
Change Text To Bold, Italic, Underline, or All Caps
To change your text to bold, italic, underline or make it all caps or all lowercase, first click on the text you want to change. Then select the ‘Format’ option from the dropdown box. From there select which option you want to change.


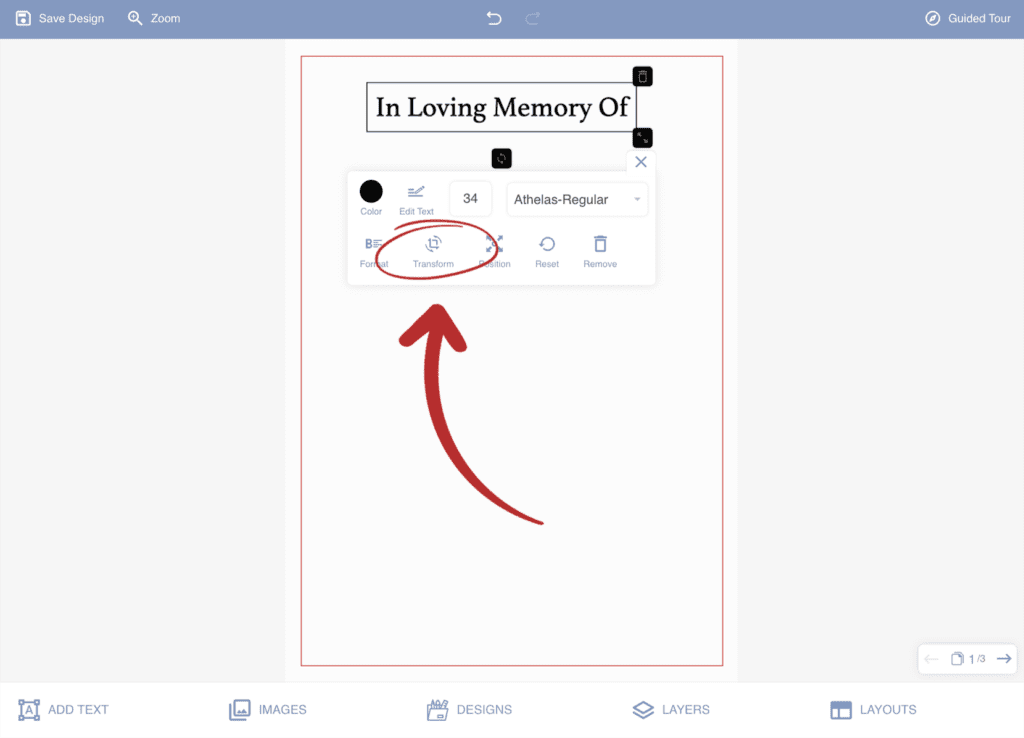
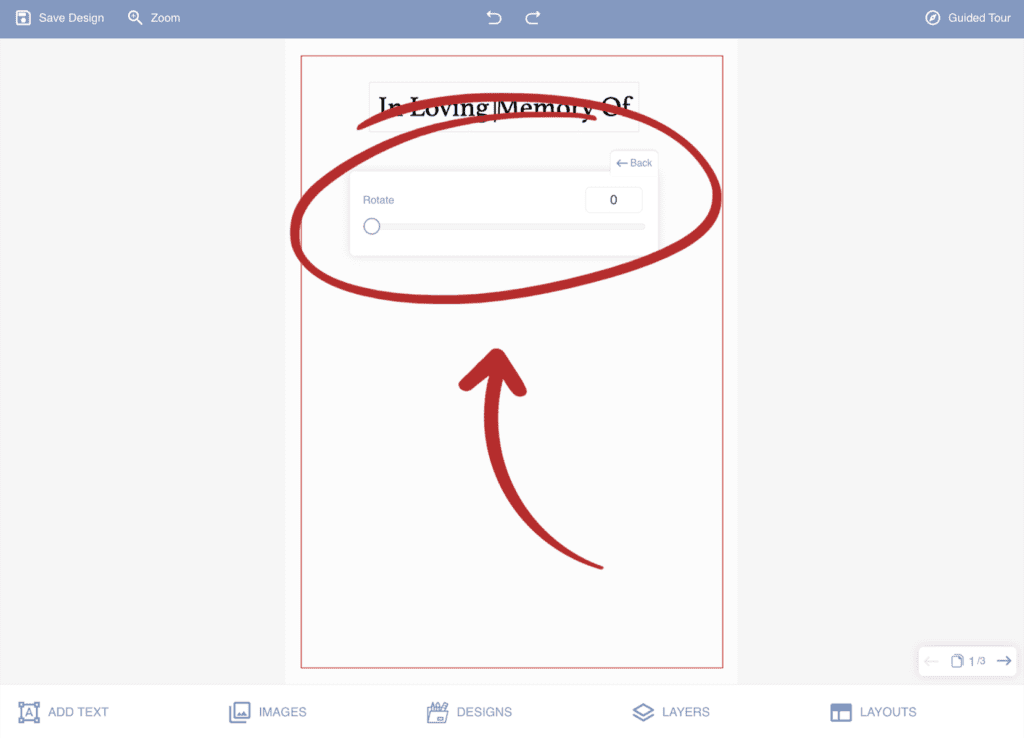
How To Rotate Text
To rotate text first click on the text you want to rotate. Then click on the ‘Transform’ option from the dropdown box. You change then use the slider to rotate your text.
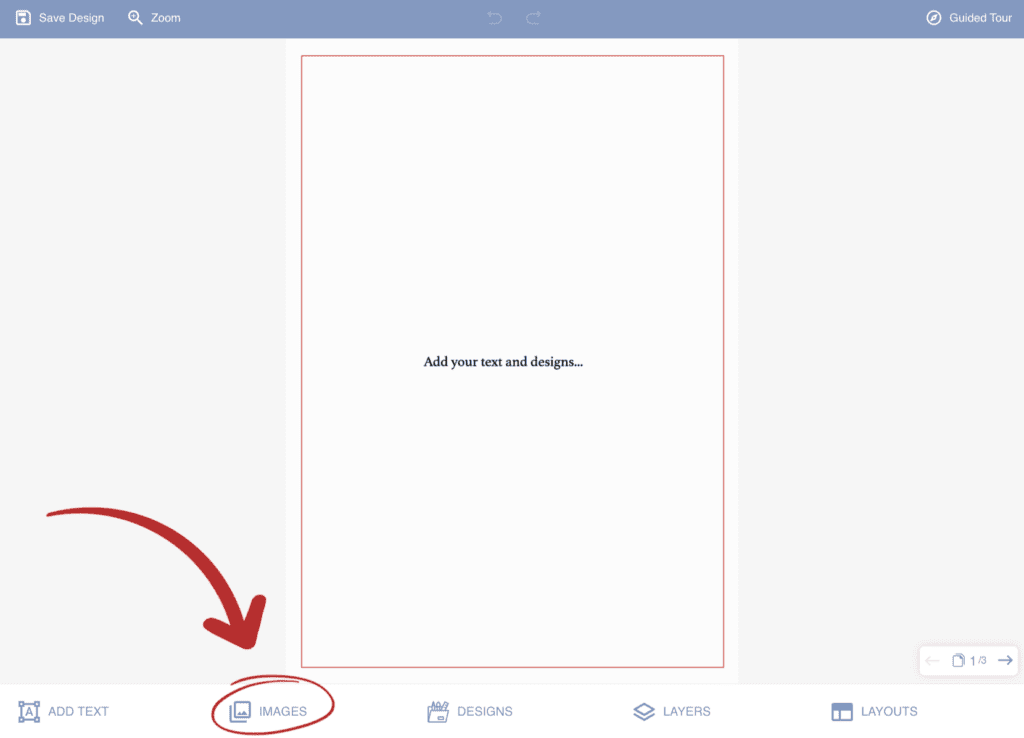
Images
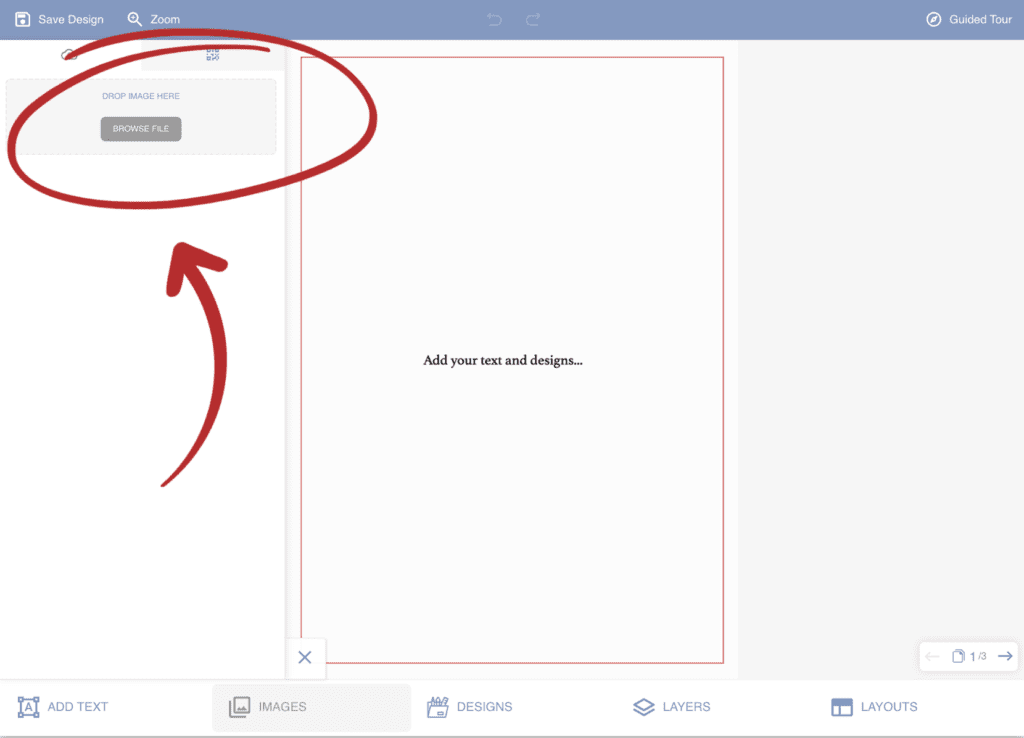
How To Add An Image
To add an image click on the ‘Images’ option on the toolbar across the bottom of the designer. A box will appear in the top left where you can either browse the files on your device or directly drop a file into the designer. Once you have selected your image it will placed on the canvas.
How To Remove An Image
To remove an image from the canvas click on the image and then click on the dustbin icon from the dropdown box.

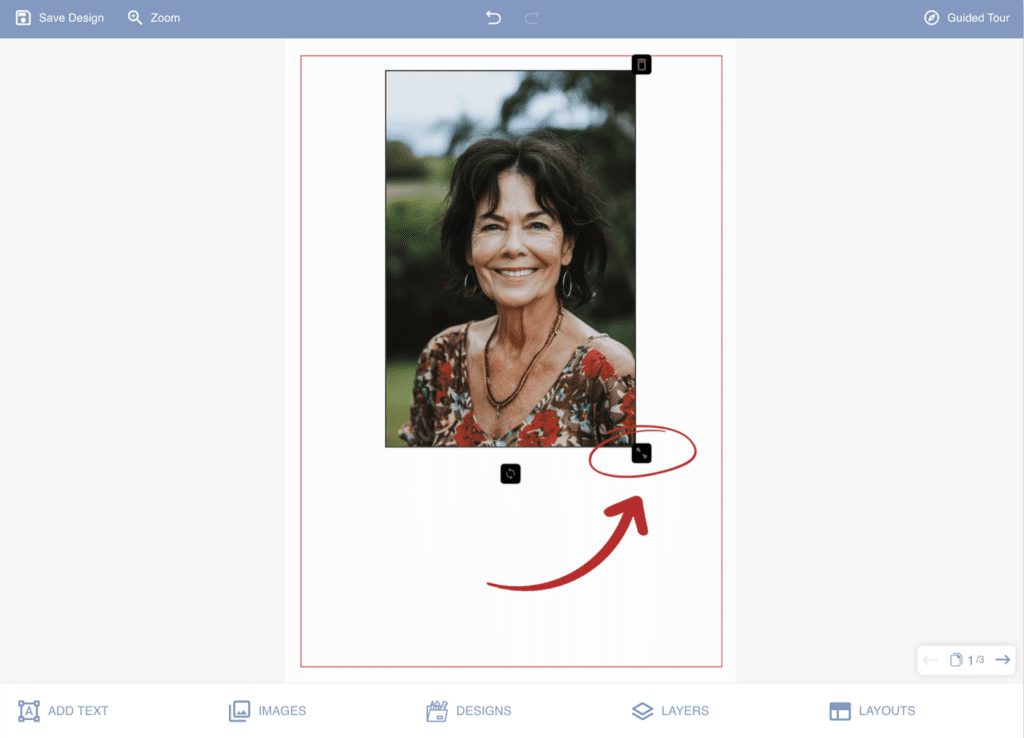
How To Move And Resize An Image
To move an image simply click on the image and drag the image to where you want the image to be. To resize the image click on the image and drag the black box in the bottom right-hand corner.
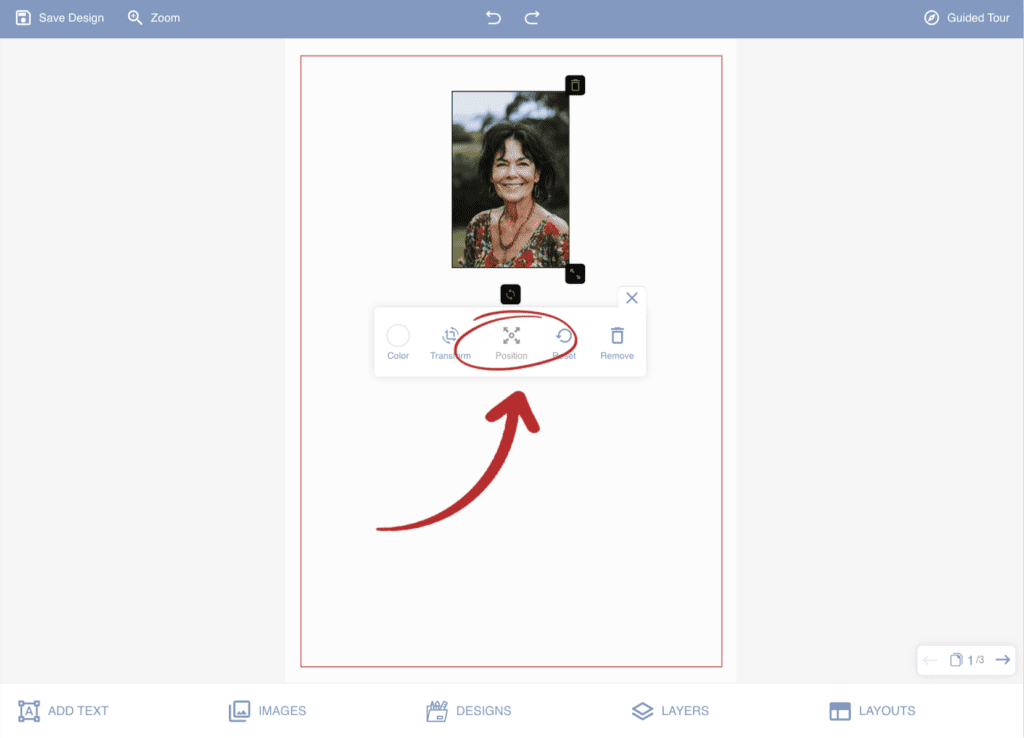
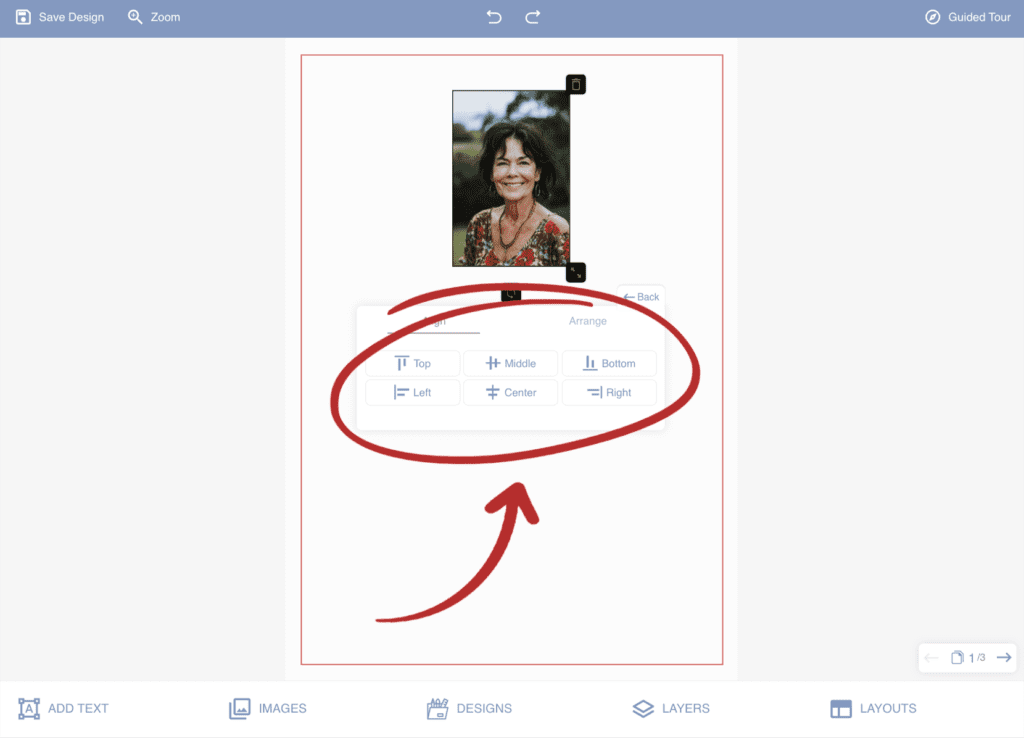
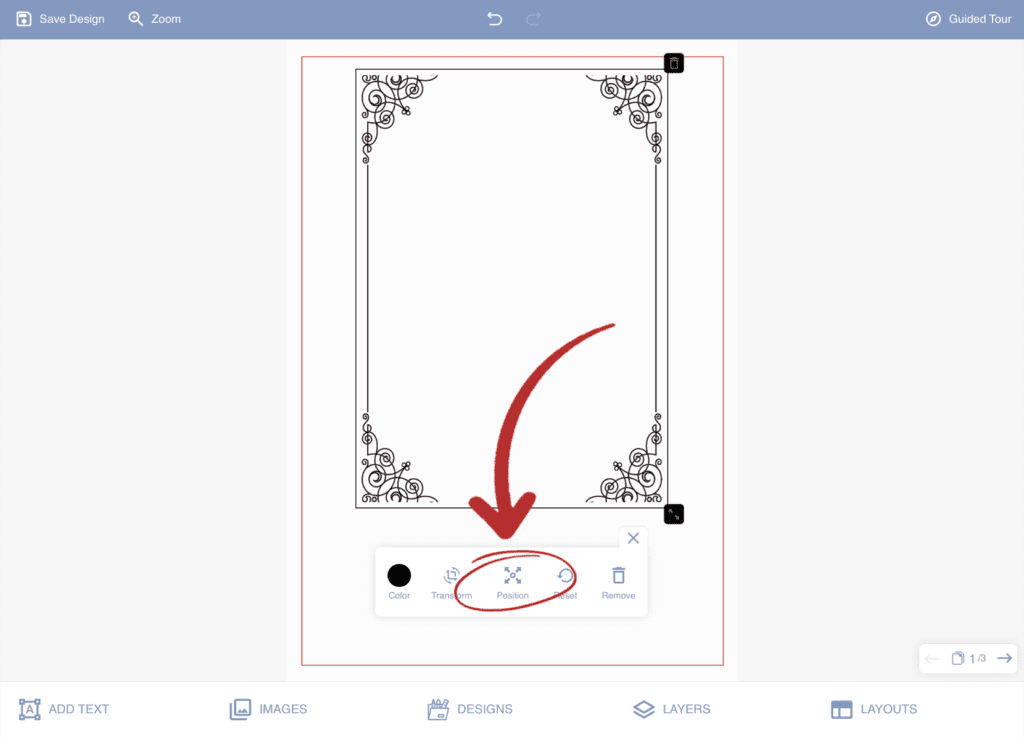
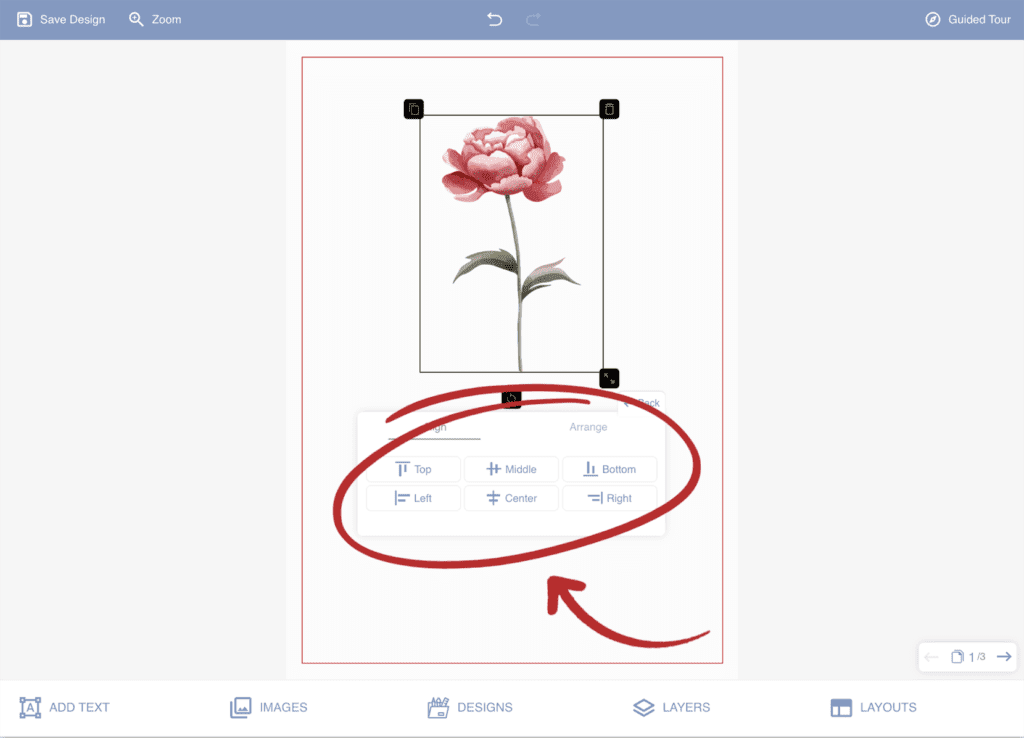
How To Align An Image
To align an image first click on the image and then select the ‘Position’ option from the dropdown box. From there you can select whether to align the image left, right, top, bottom, middle, or center.
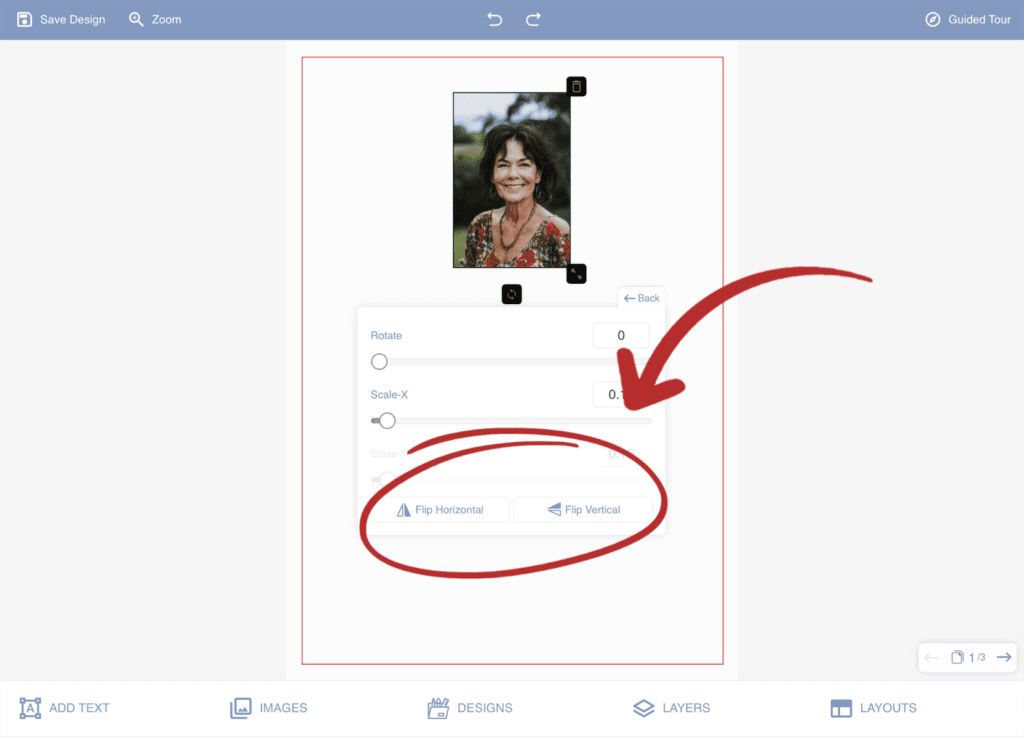
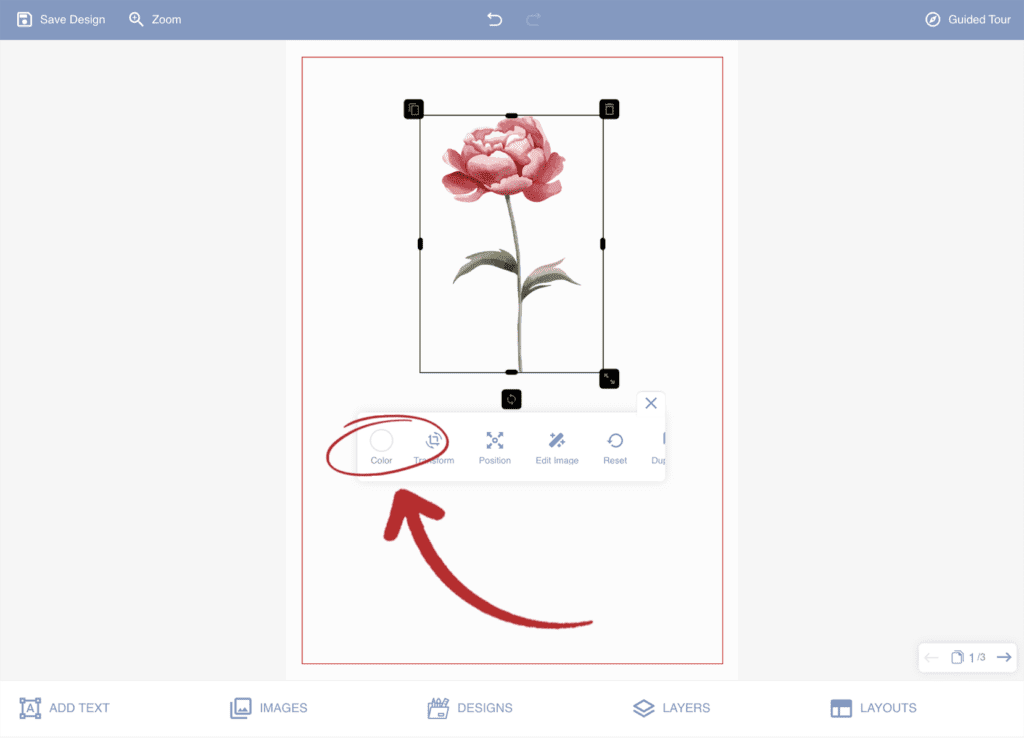
How To Flip An Image Horizontally Or Vertically
To flip an image first click on the image and then select the ‘Transform’ option from the dropdown box. From there you can choose whether to flip the image horizontally or vertically.
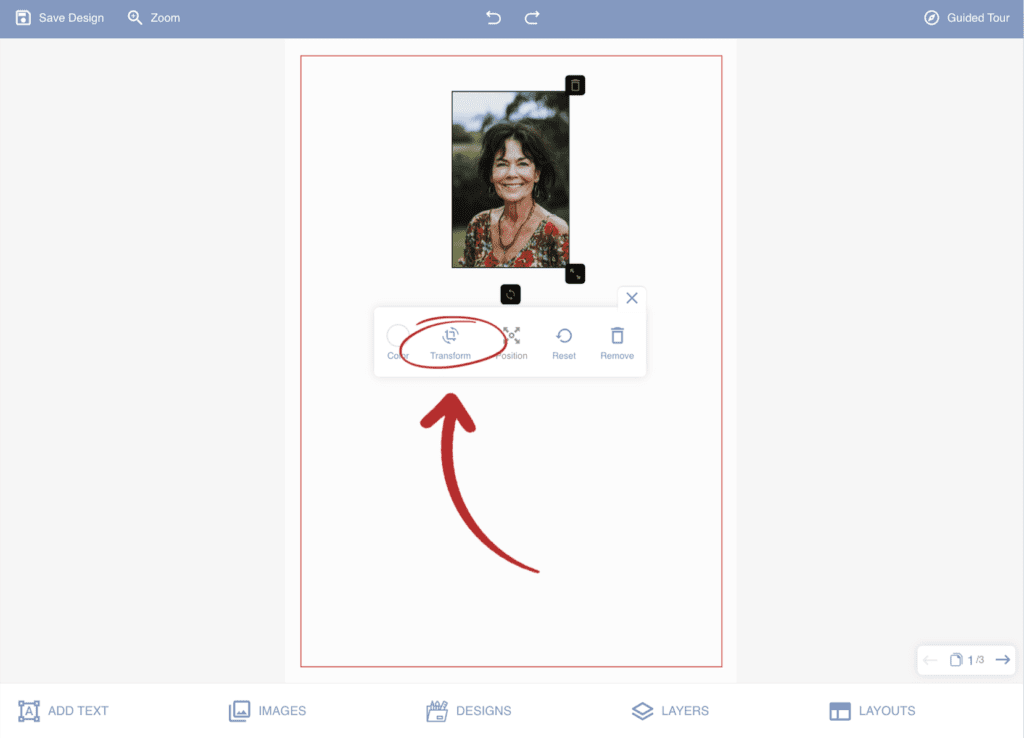
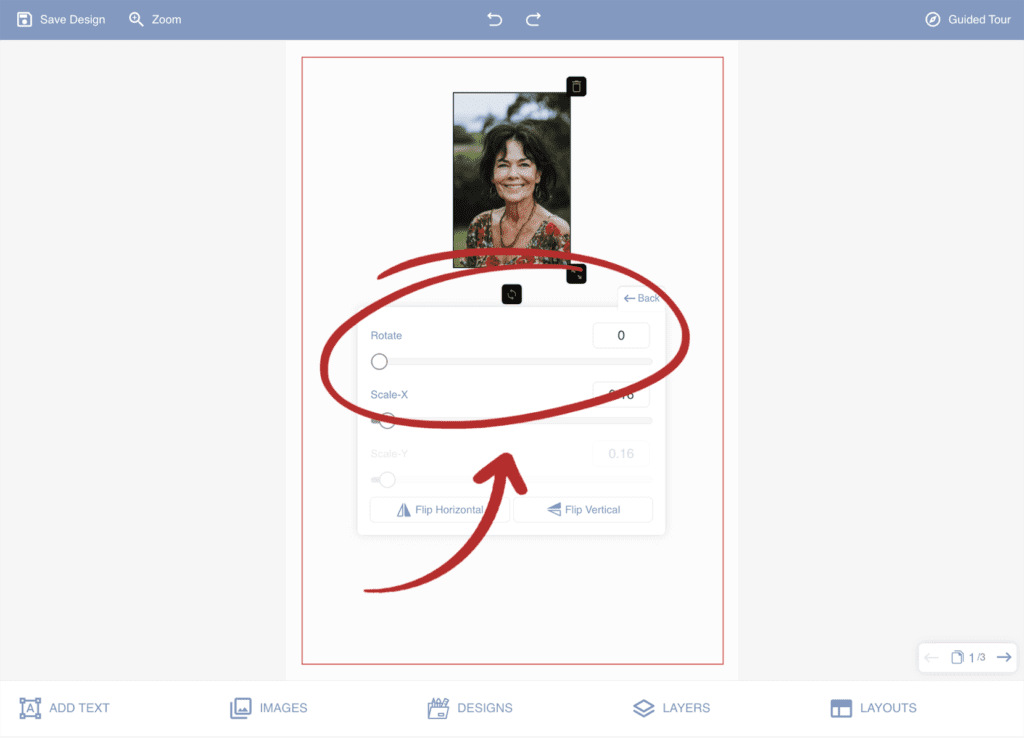
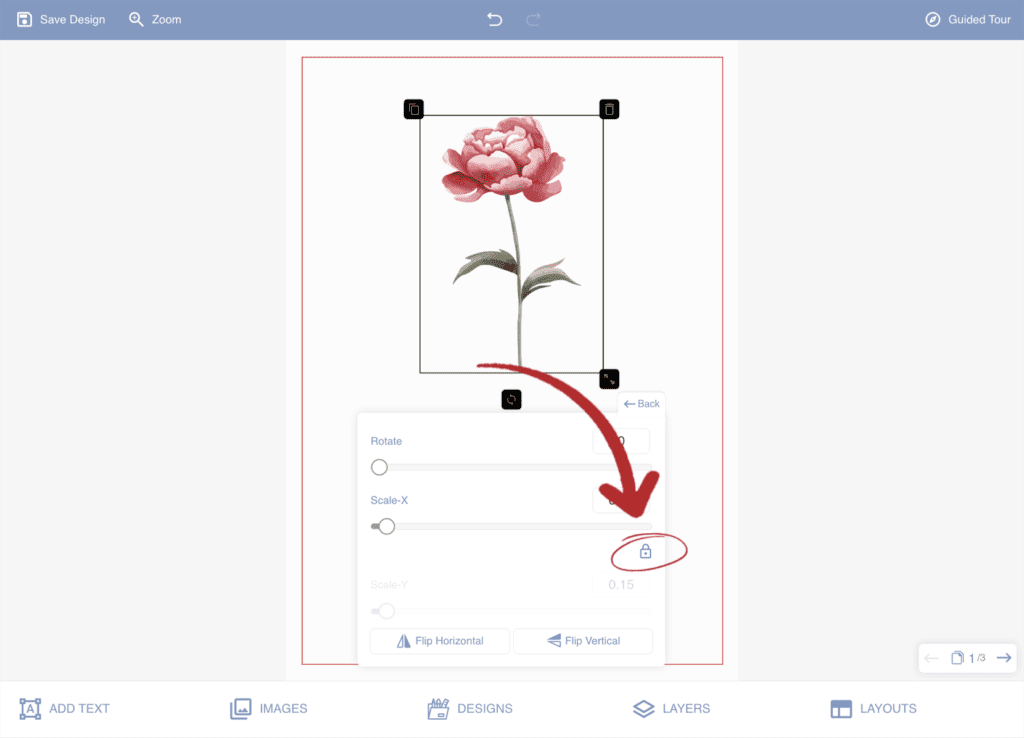
How To Rotate An Image
To rotate an image first click on the image and then select the ‘Transform’ option from the dropdown box. From there you can use the slider to rotate the image.
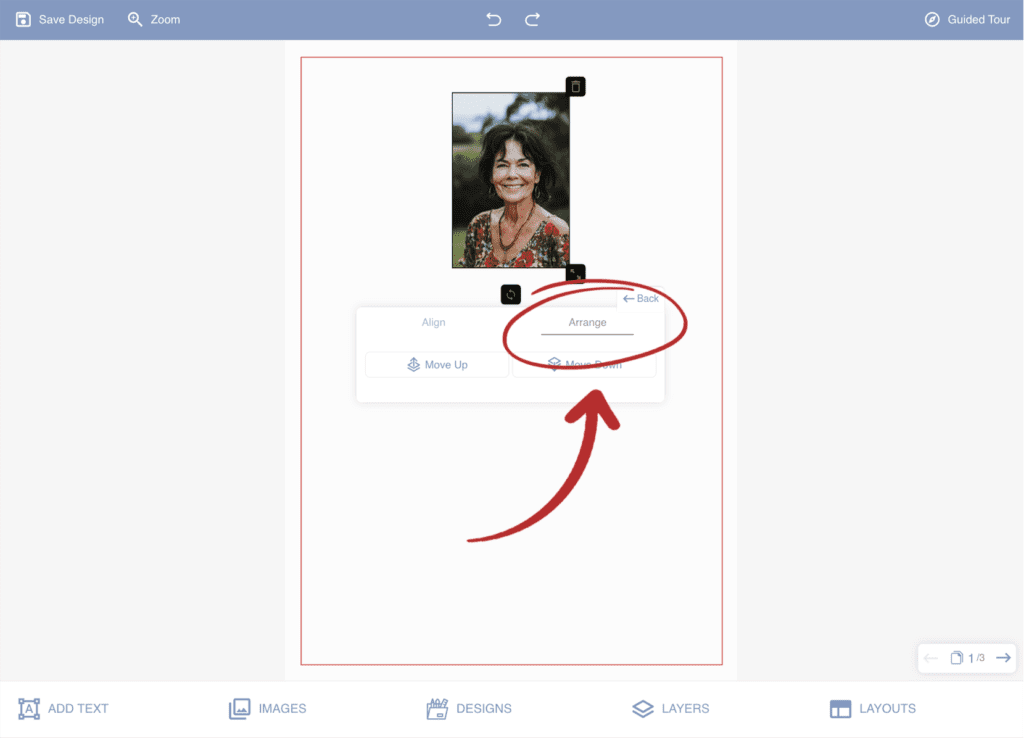
How To Change The Layer Position Of An Image
To change the layer position of an image (move the image above or below other elements on the canvas) first click on the image and then select the ‘Position’ option from the dropdown box. From there click on the ‘arrange’ option and then you move your image layer position up or down.
Frames/Borders
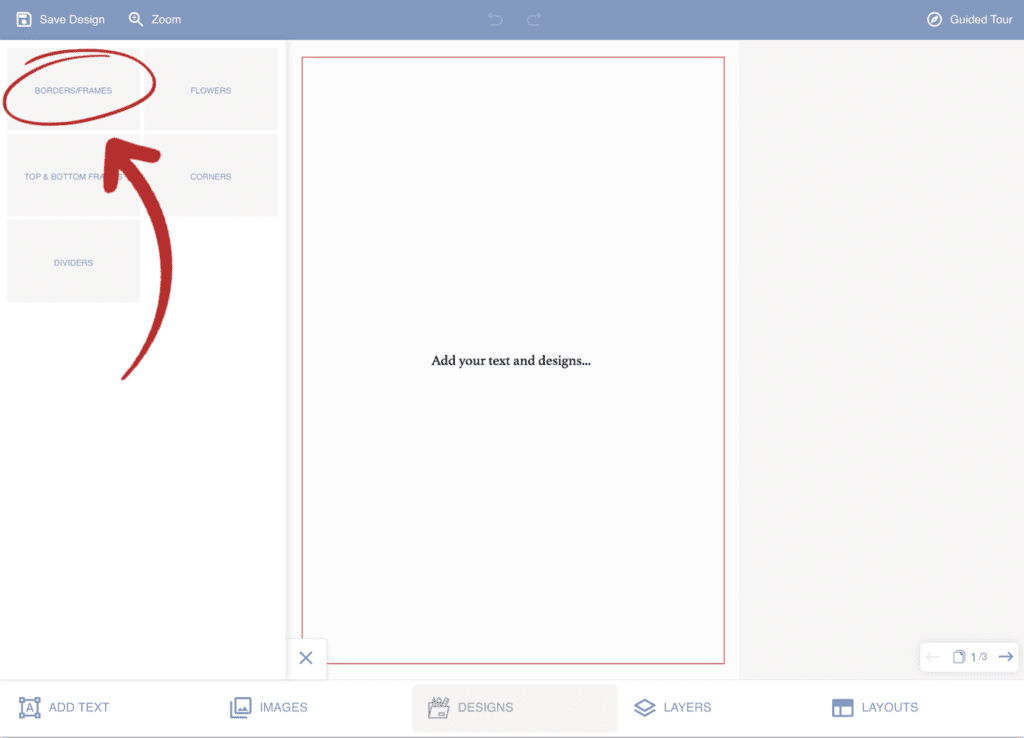
How To Add A Frame
To add a frame or border click on the ‘Designs’ option on the toolbar across the bottom of the designer. A box will appear in the top left where you can choose a design category. Select the ‘Borde/Frames’ category and you can then select which frame you would like to add to the canvas.
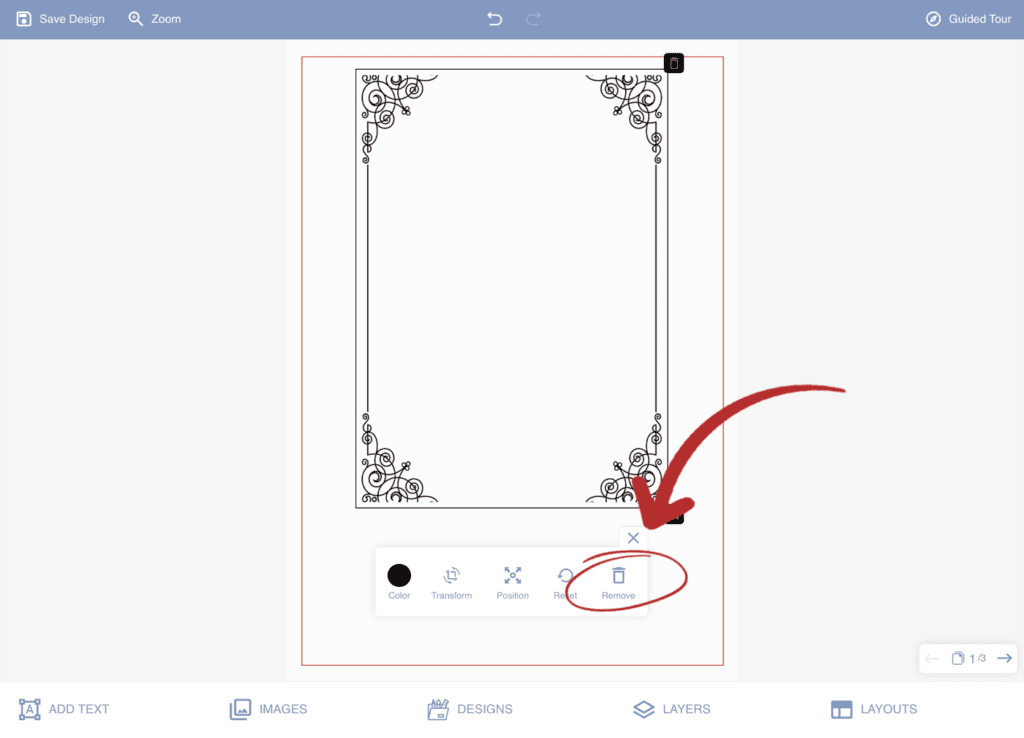
How To Remove A Frame
To remove a frame first click on the frame. Then click on the dustin icon from the dropdown box to remove the frame from the canvas.
How To Move And Resize A Frame
To move a frame simply click on the frame and drag it to where you want the frame to be. To resize a frame click on the frame and drag the black box in the bottom right-hand corner.
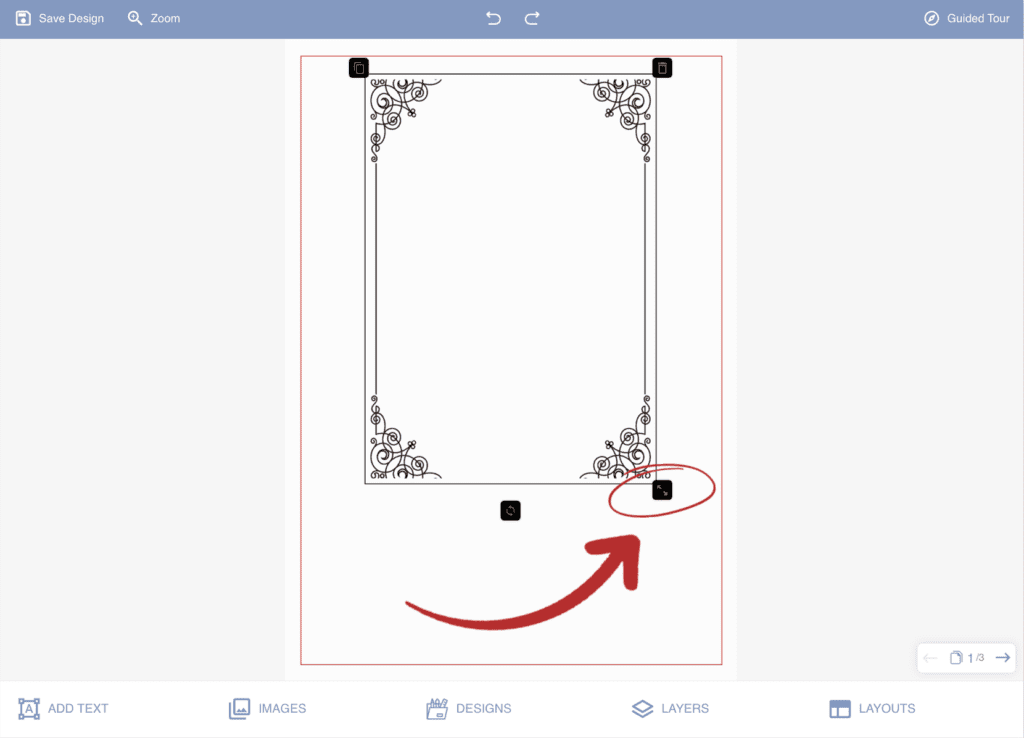
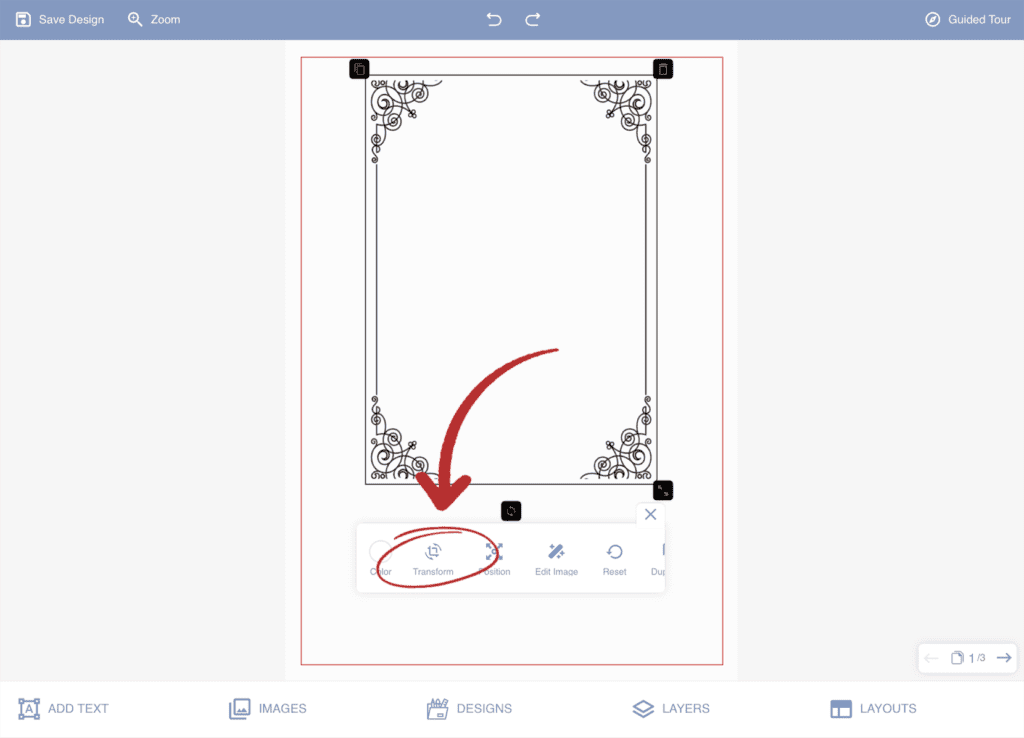
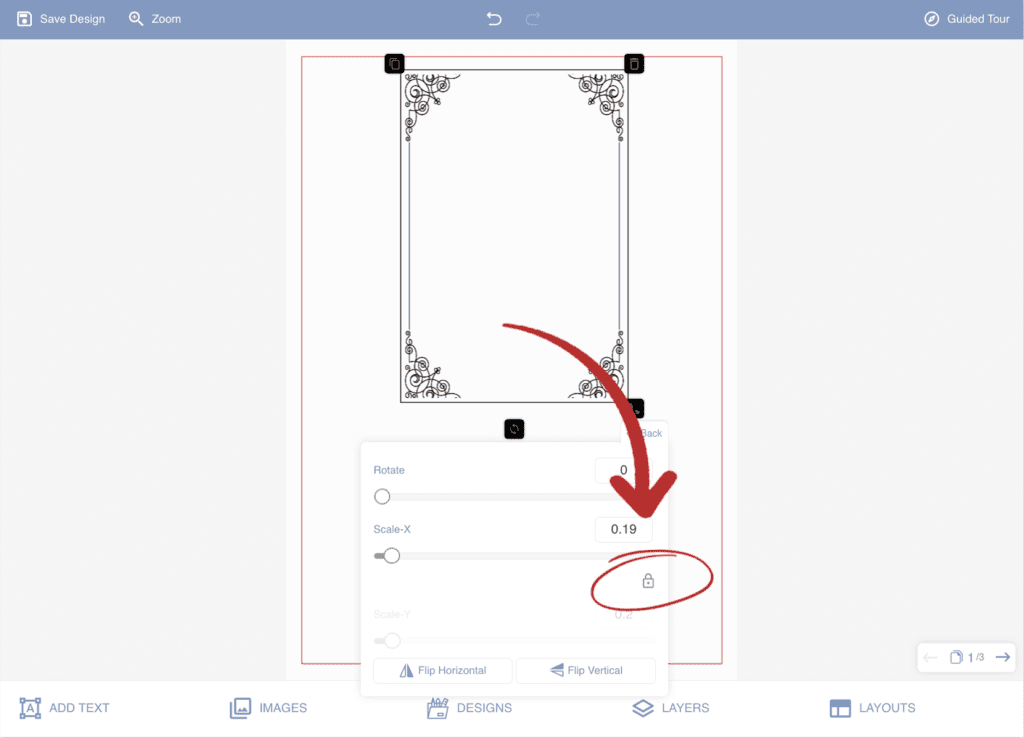
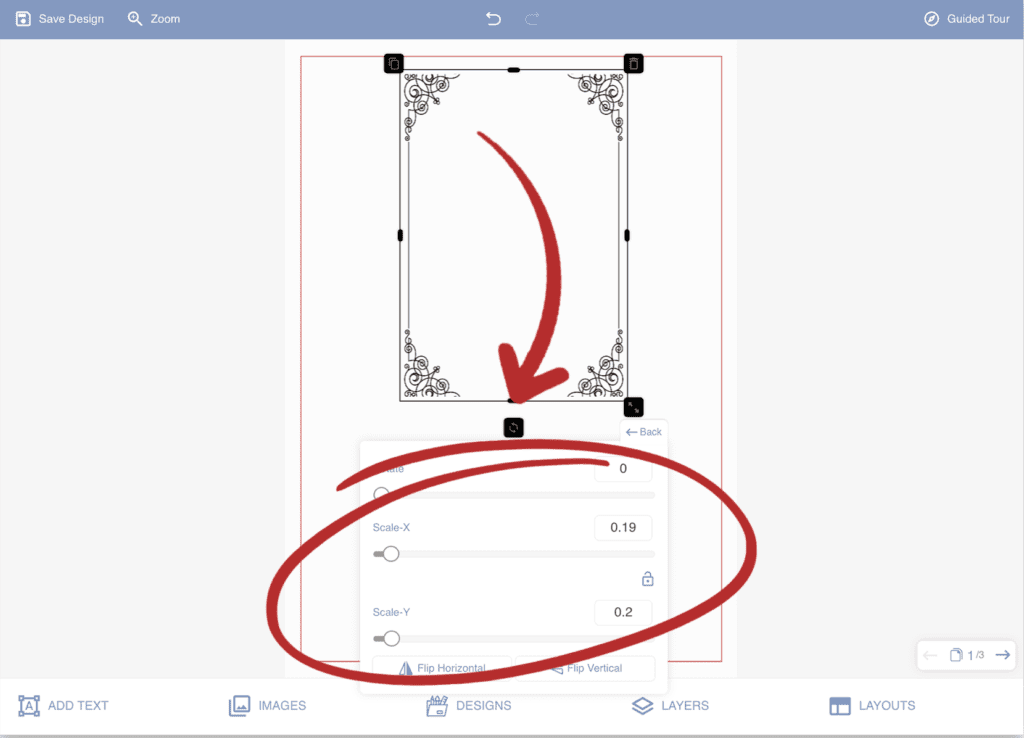
How To Change The Width And Height Of A Frame
To change the width and height of a frame first click on the frame. Then click on the ‘Transform’ option from the dropdown box. Then click on the small padlock icon and you can then change the height and width using the ‘scale-x’ and ‘scale-y’ sliders.
How To Align A Frame
To align a frame first click on the frame. Then click on the ‘Position’ option from the dropdown box. You can then choose to align the frame either left, right, top, bottom, middle, or center.

How To Change The Colour of A Frame
To change the colour of a frame first click on the frame. Then click on the ‘Colour’ option from the dropdown box. You can then choose to change the colour using the colour picker or enter a hex value.
Designs
What Is A Design?
A ‘design’ is a collection of artwork that can be added to the canvas. The categories of designs include frames and borders, flowers, top and bottom frames, corners, dividers and miscellaneous clip art.
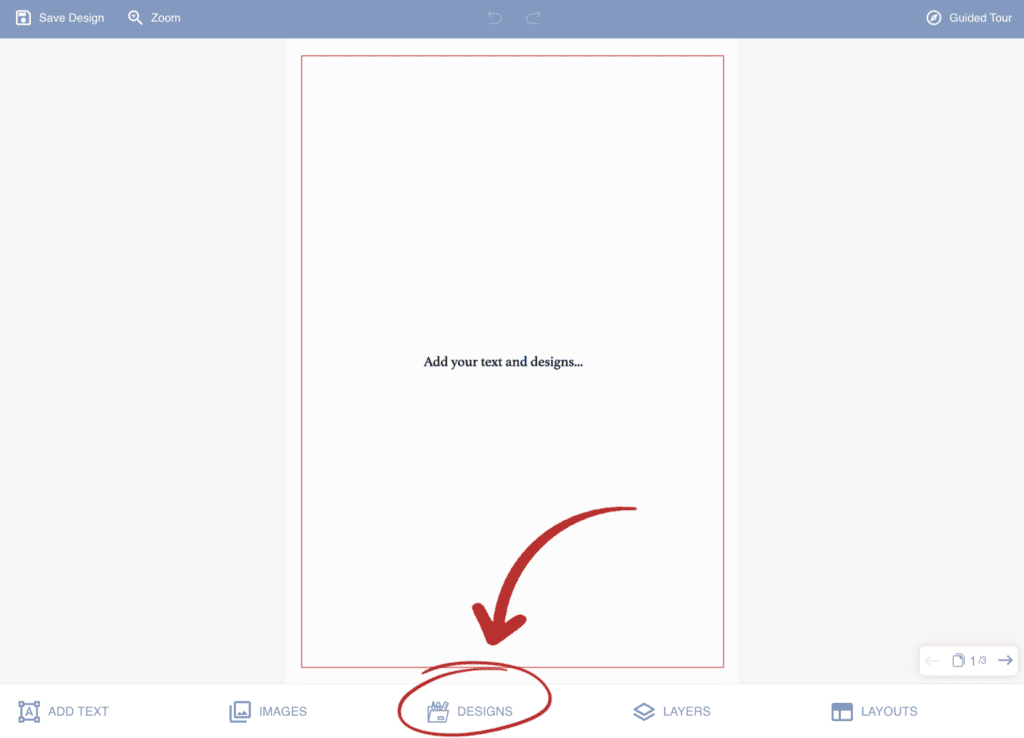
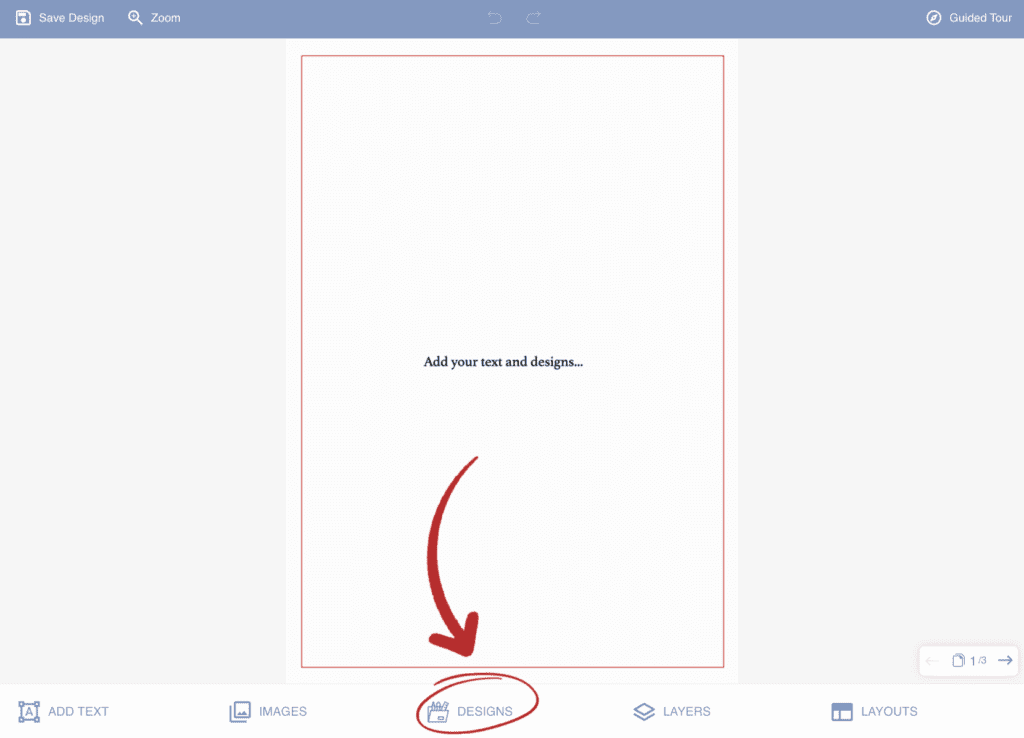
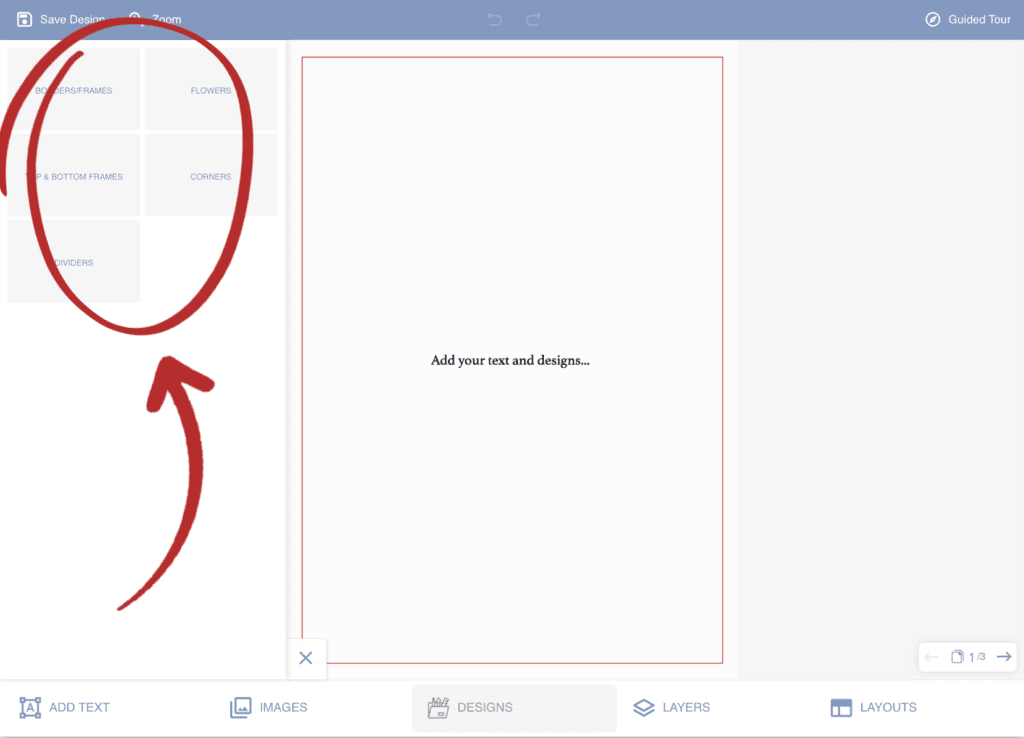
How To Add A Design
To add a design first click on the ‘Designs’ option on the toolbar across the bottom of the designer. A box will appear in the top left where you can select a design category including borders/frames, flowers, top and bottom frames, corners, dividers, and clipart. Select a category to browse through the different designs. Once you have found a design you like simply click on the design to add it to the canvas.
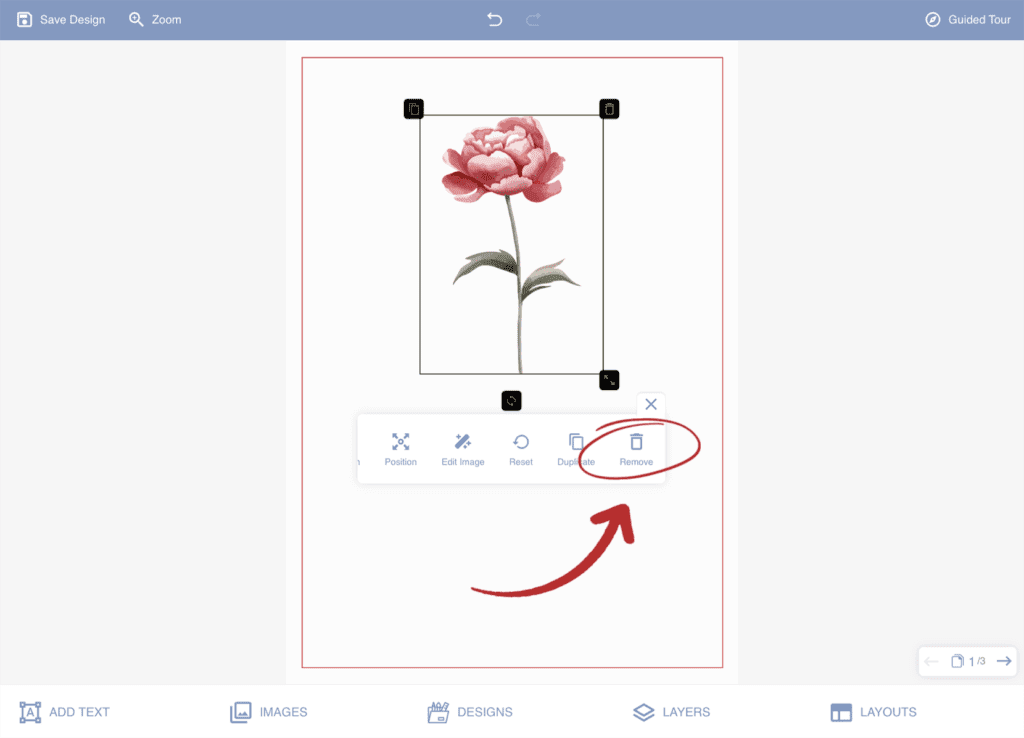
How To Remove A Design
To remove a design first click on the design. Then click on the dustbin icon from the dropdown box.
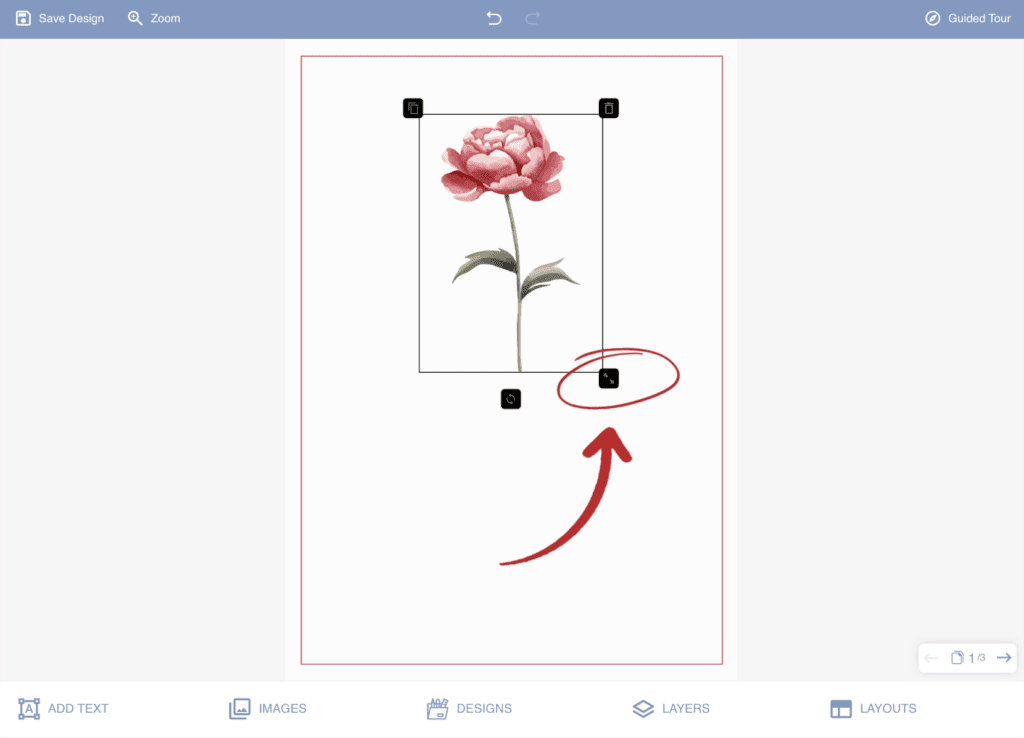
How To Move And Resize A Design
To move a design simply click on the design and drag to where you want it to be. To resize a design click on the design and drag the black box in the bottom right-hand corner.
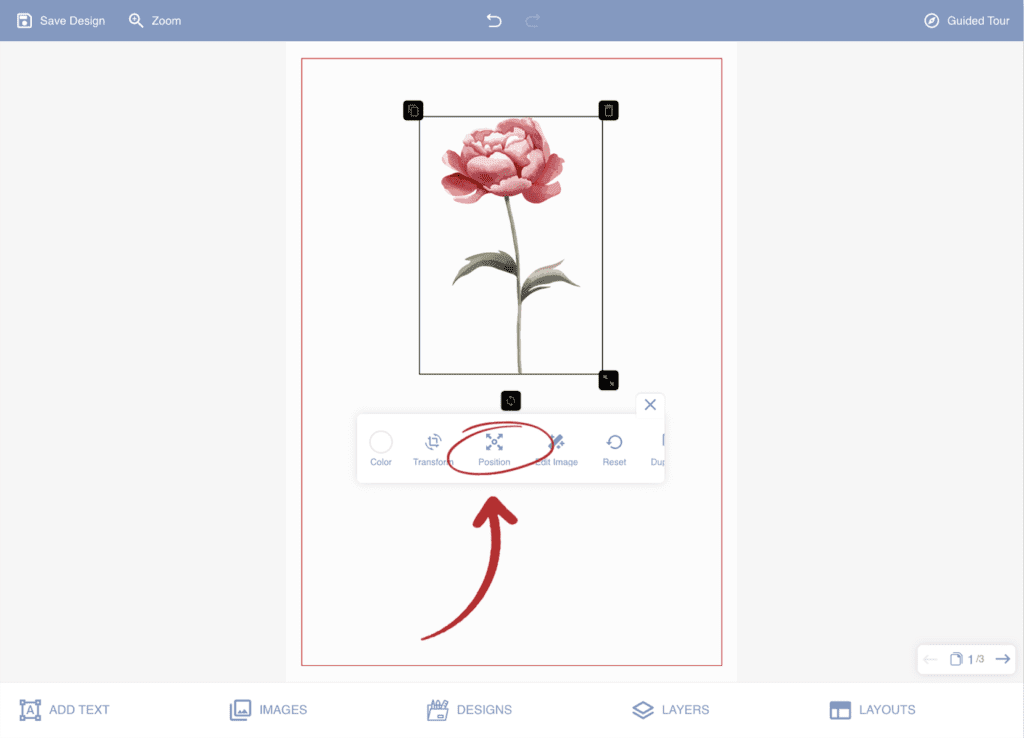
How To Align A Design
To align a design first click on the design. Then click on the ‘Position’ option from the dropdown box. You can then choose to align the deisgn either left, right, top, bottom, middle, or center.
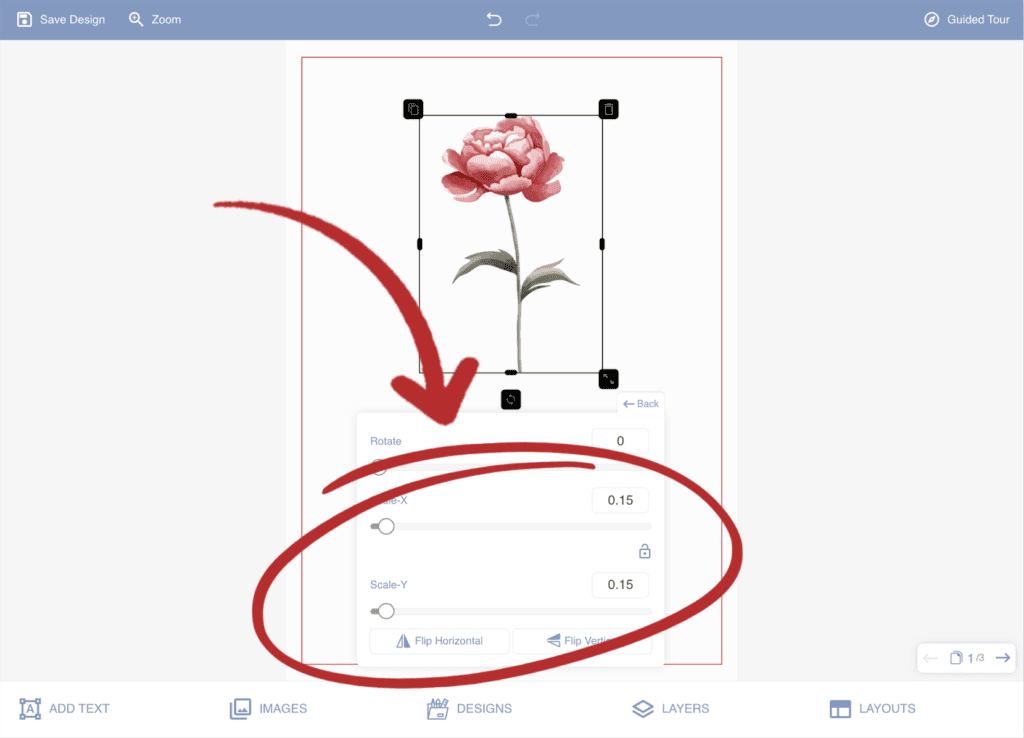
How To Change The Width And Height Of A Design
To change the width and height of a design first click on the design. Then click on the ‘Transform’ option from the dropdown box. Then click on the small padlock icon and you can then change the height and width using the ‘scale-x’ and ‘scale-y’ sliders.

How To Change The Colour Of A Design
To change the colour of a design first click on the design you want the change. Then select the ‘Colour’ option from the dropdown box. From there you can select a colour with the colour picker or enter a hex value.
Layouts
What Are Layouts?
A layout is a full-page template that can be used to upload photos.
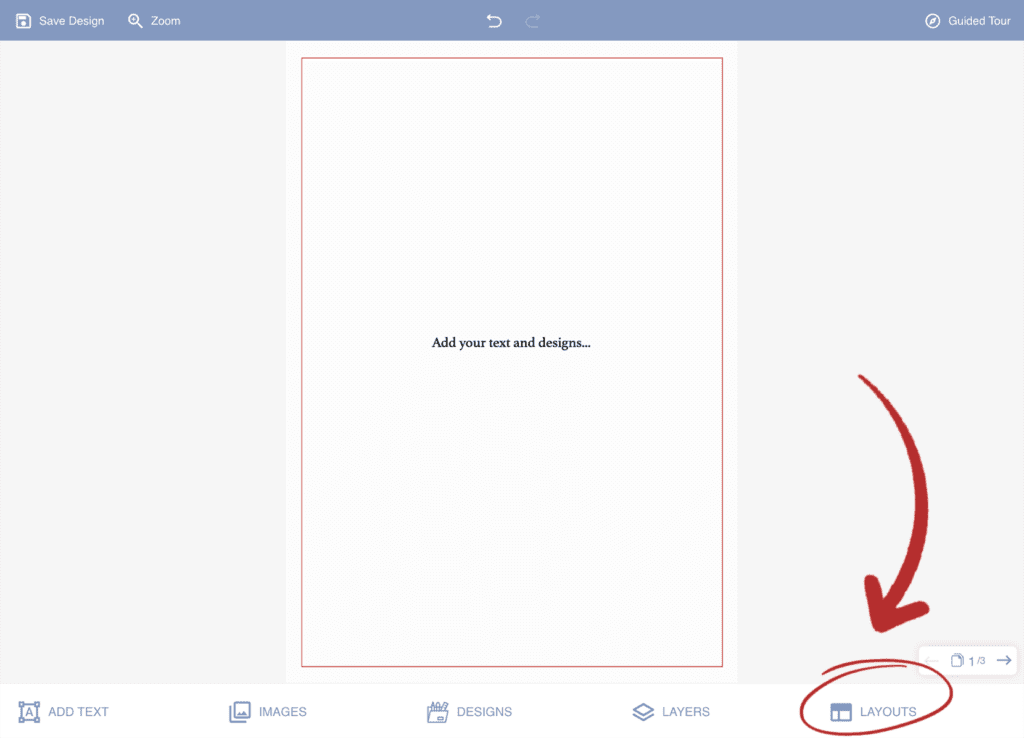
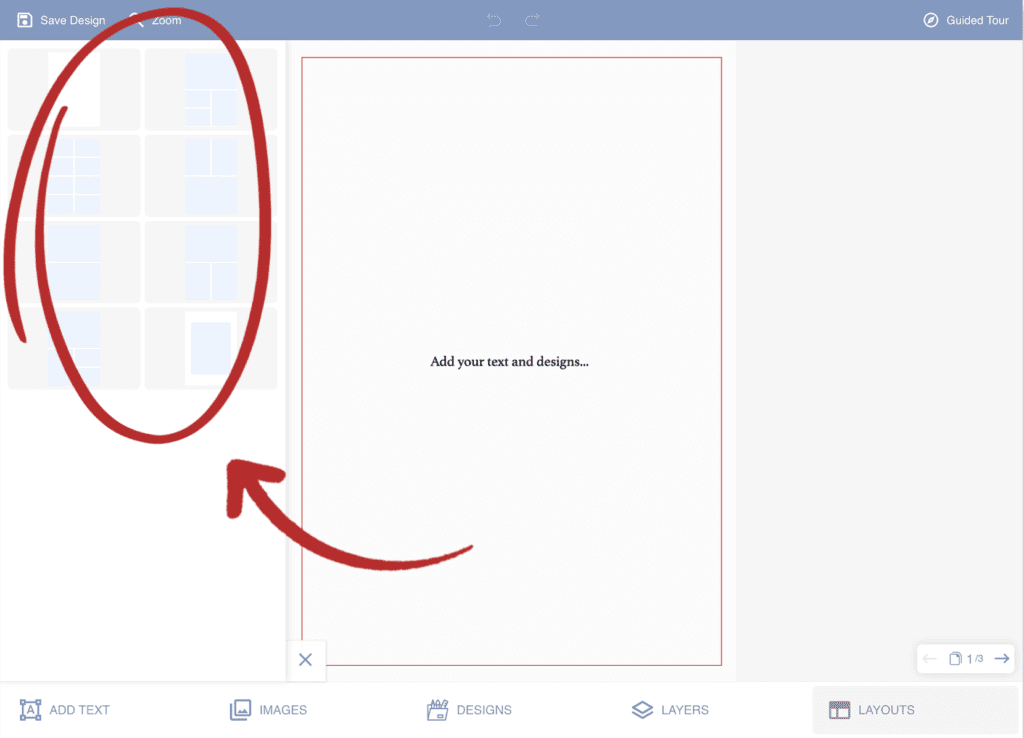
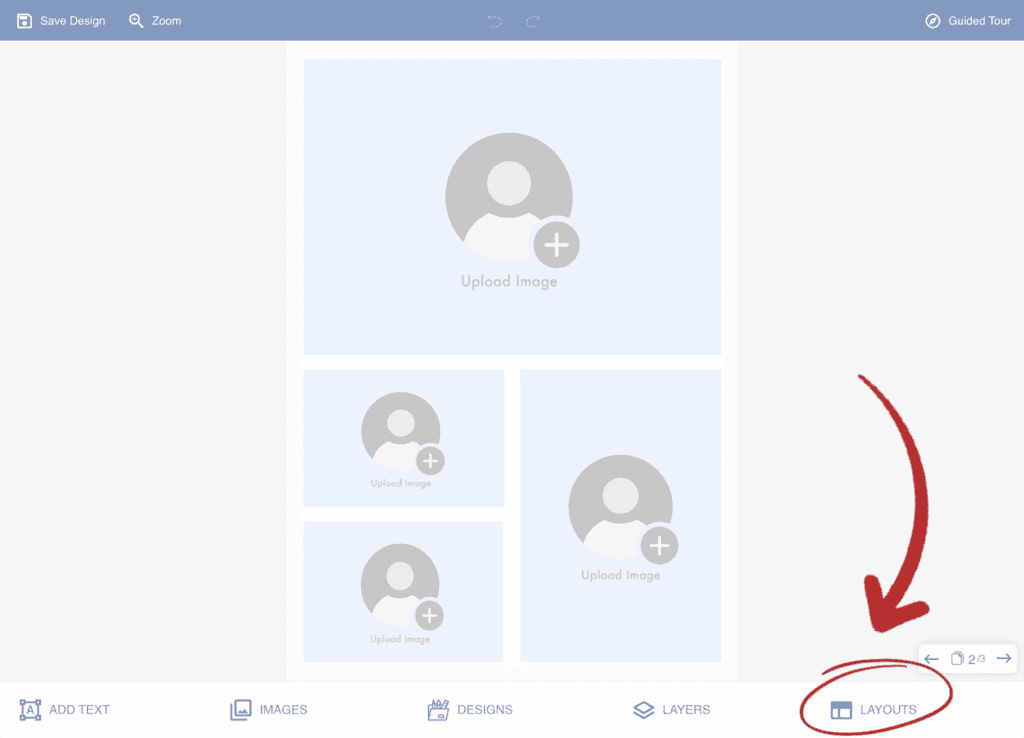
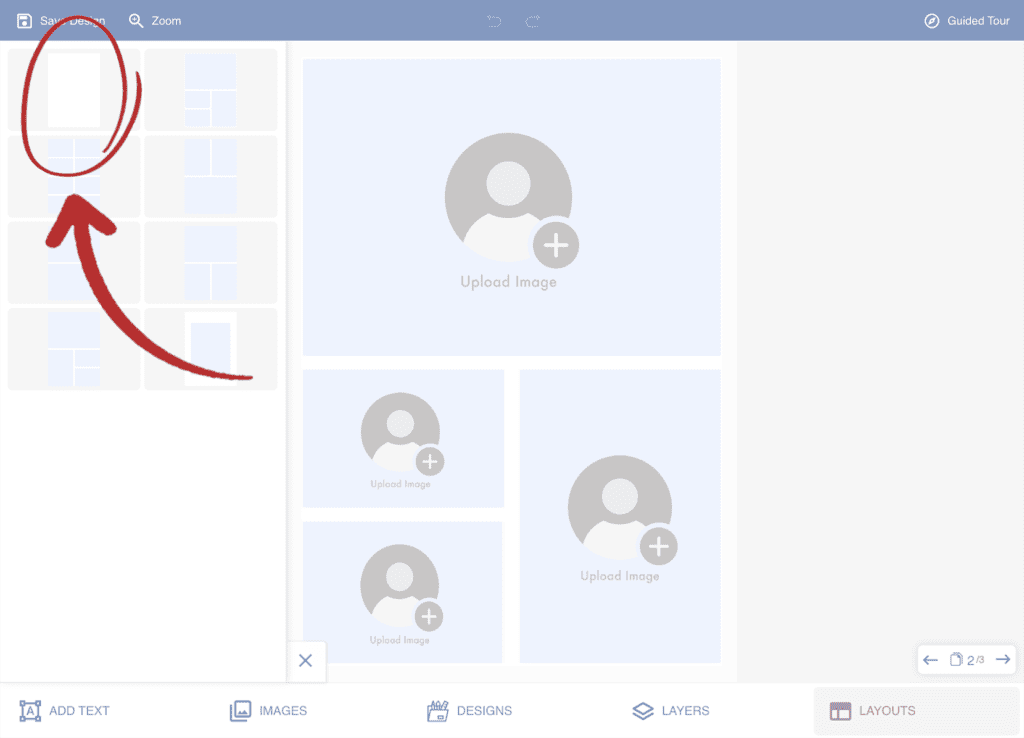
How To Add A Layout
To add a layout to upload photos, first select the ‘Layouts’ option from the toolbar at the bottom of the designer. A range of photo layouts will then be displayed on the left-hand side of the designer. To add a layout click on the layout you like and it will be added to the current page.
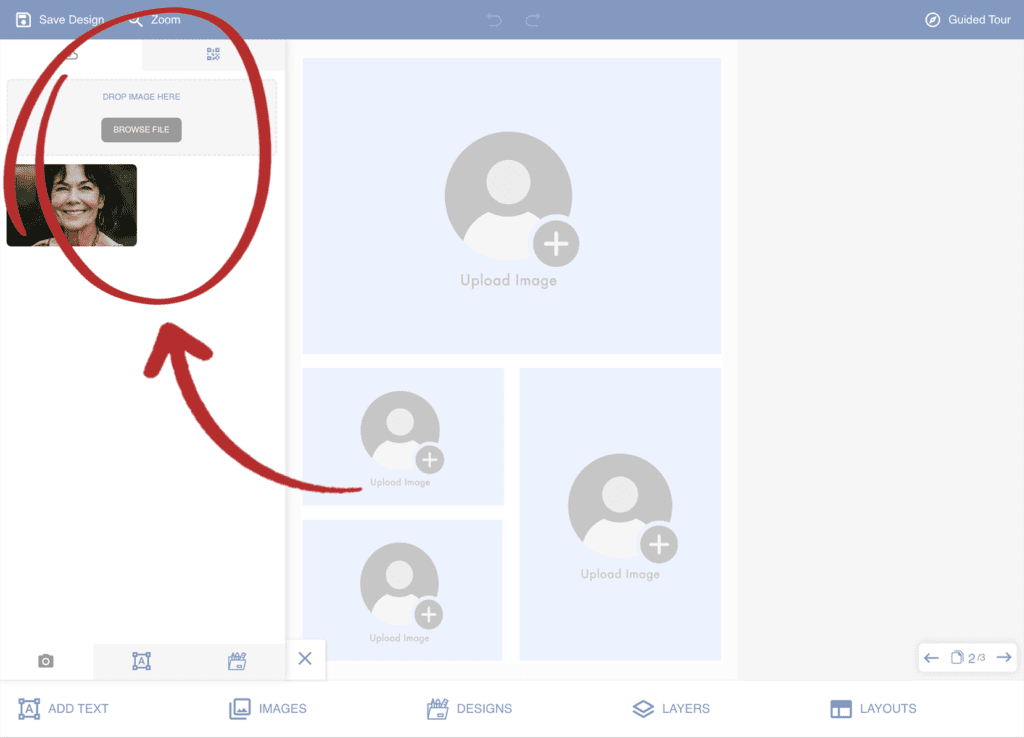
To add a photo to a layout click on the ‘Upload Image’ placeholder on the canvas. Then either drop your image into the box on the left-hand side or select ‘browse’ to select the image from your device.
How To Remove A Layout
To remove a layout click on the ‘Layouts’ option from the toolbar at the bottom of the designer. Then select the ‘blank page’ layout from the selection of layouts on the left-hand side.
Layers
What Are Layers?
Each item on the canvas is placed on a layer and stacked one above the other. The layer order determines what items are on top or below other items. For example, the background or frame will be on the bottom layer so every other layer will appear above this.
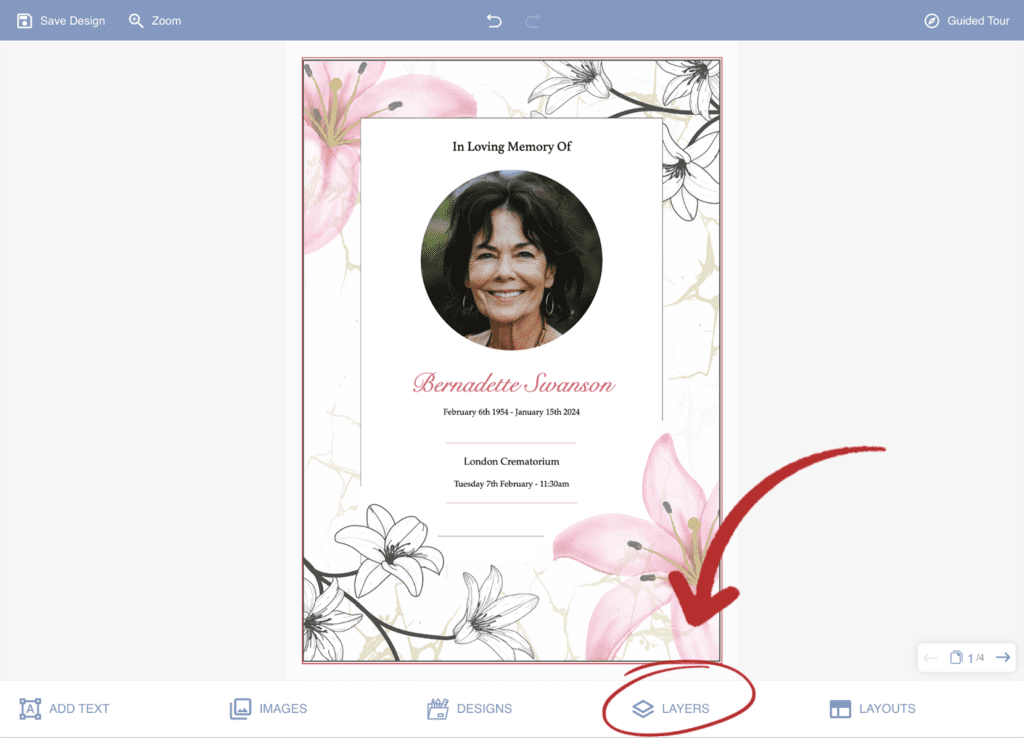
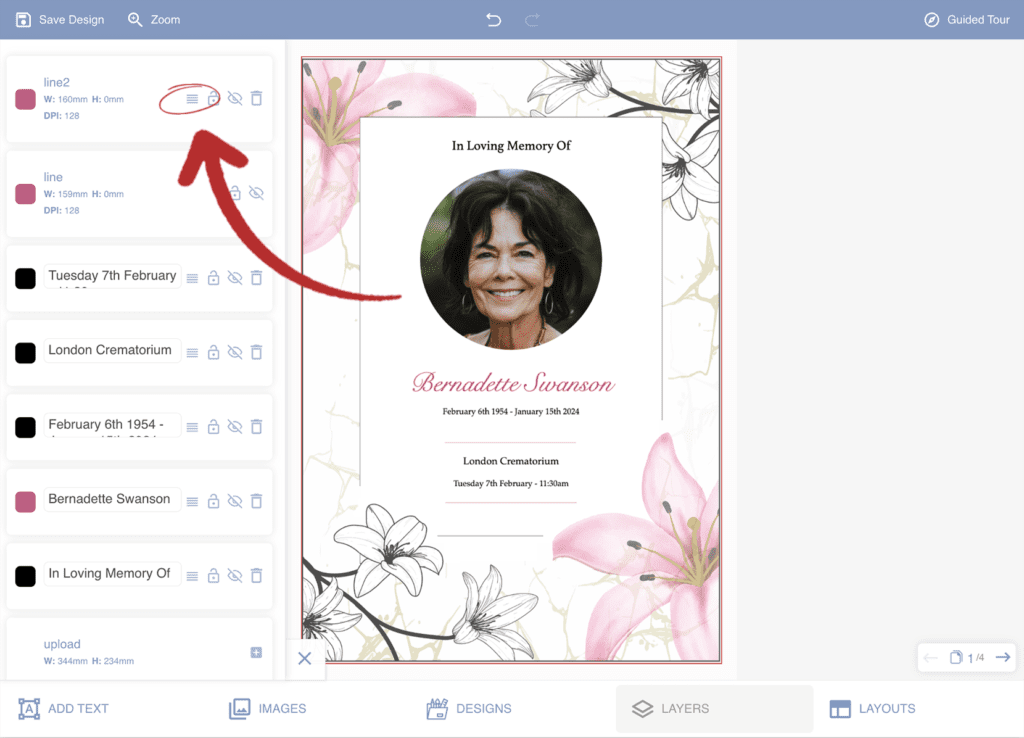
How To Change The Position Of A Layer
To change the position of a layer click on the ‘Layers’ option from the toolbar at the bottom of the designer. A list of the layers in order from top to bottom will appear on the left-hand side. From there select the icon with 3 lines on the layer you want to move and drag the layer to the position you want.
How To Lock A Layer
To lock a layer click on the ‘Layers’ option from the toolbar at the bottom of the designer. Then click on the padlock icon on the layer you want to lock. The layer will now be locked so you can work on other areas of the canvas without it getting in the way. To unlock the layer follow the same steps.

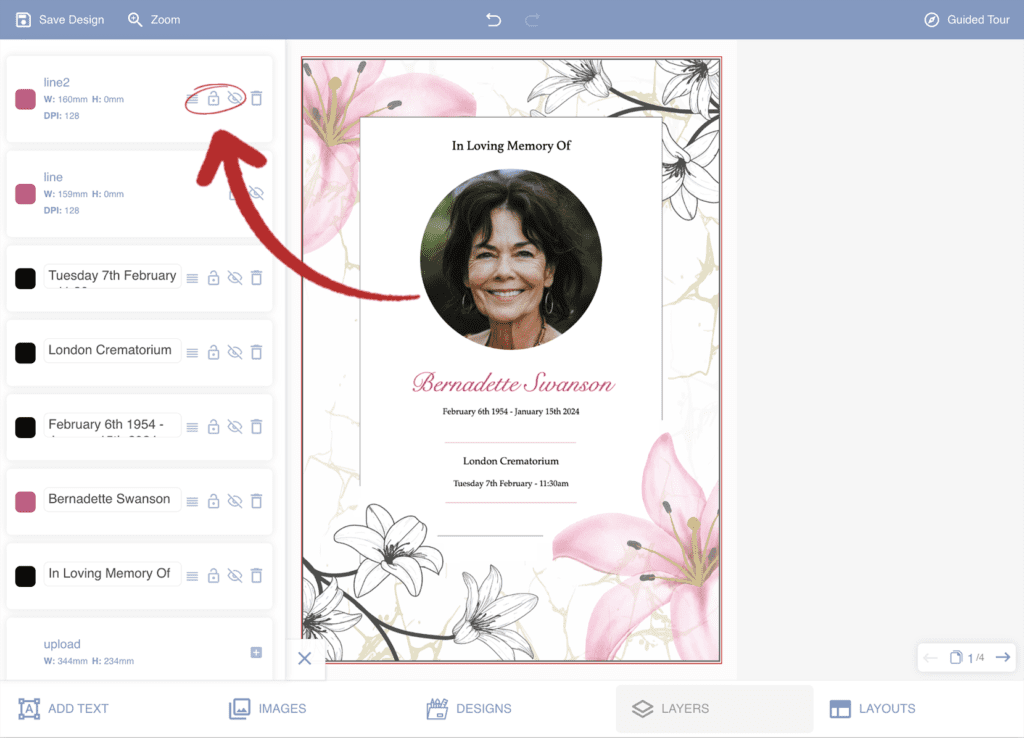
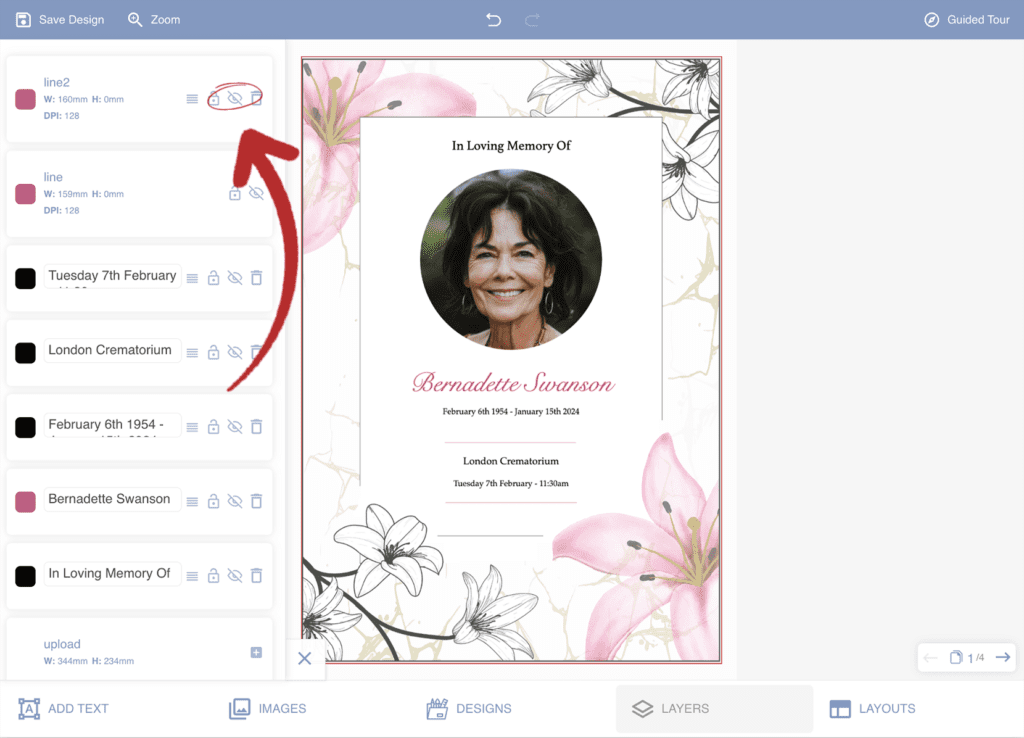
How To Make A Layer Invisible
You can make a layer invisible so it’s temporarily not on the canvas but has not been removed. First, click on the ‘Layers’ option from the toolbar at the bottom of the designer. Then click the eye icon on the layer you want to make invisible. To make the layer visible again follow the same steps.

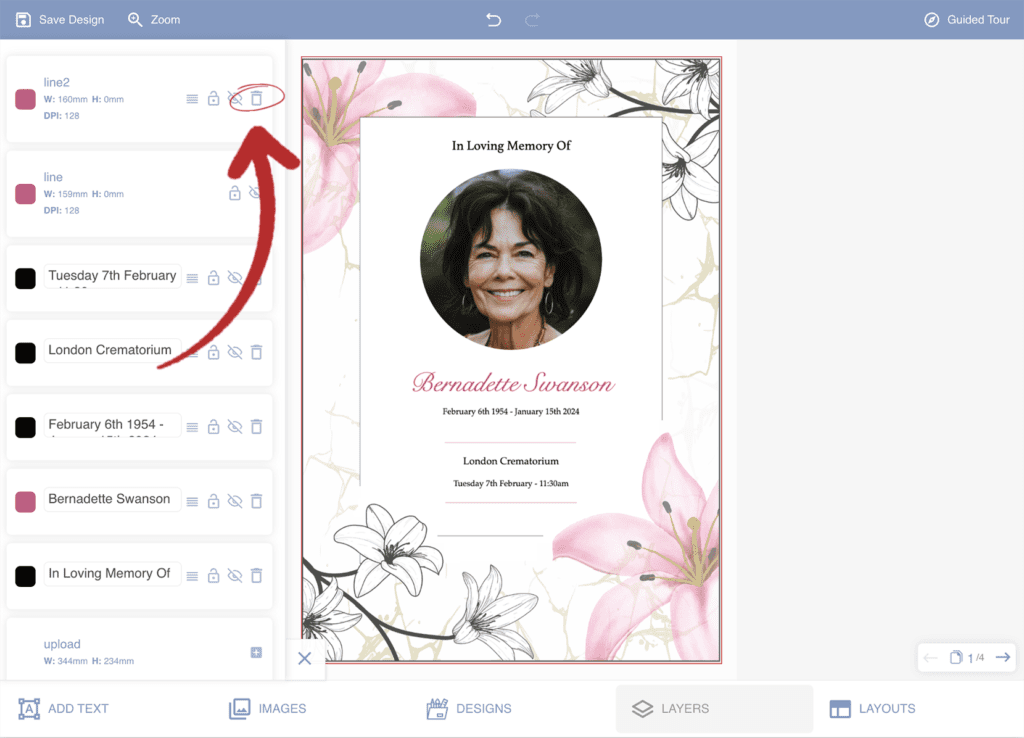
How To Remove A Layer
To remove a layer, first click on the ‘Layers’ option from the toolbar at the bottom of the designer. From there click on the dustbin icon on the layer you want to remove.
Undo and Redo
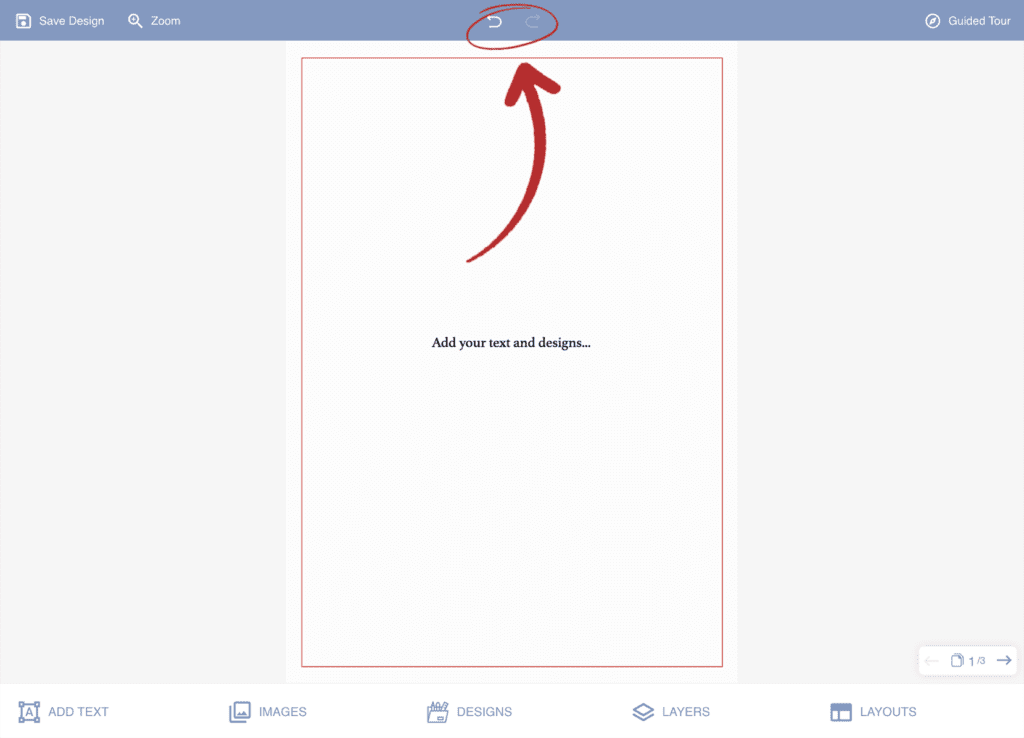
How To Undo And Redo A Step
To undo or redo any changes you have made click on the back arrow (undo) or the forward arrow (redo) at the top of the designer.
Saving Your Design
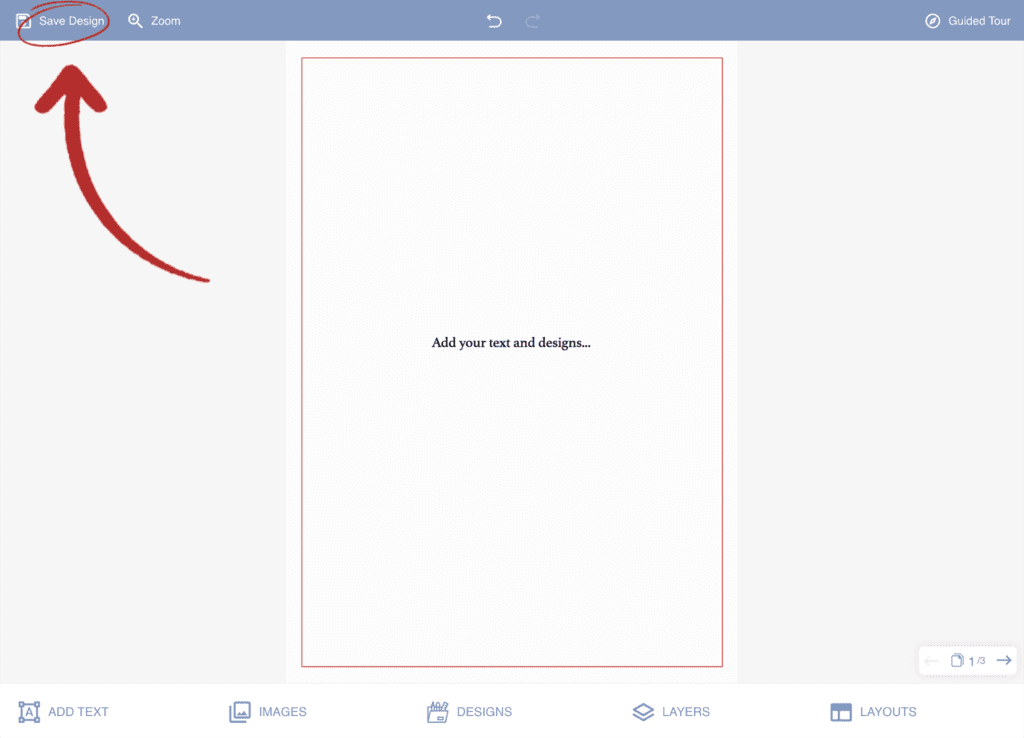
How To Save Your Design
Before saving your design you will need to create an account. We advise customers before they begin that if they want to save their design to continue editing later then they have to create an account where the design can be saved.
To create an account we only need a username and your email address and we never share any information with 3rd parties or send any marketing ourselves. You can create an account here.
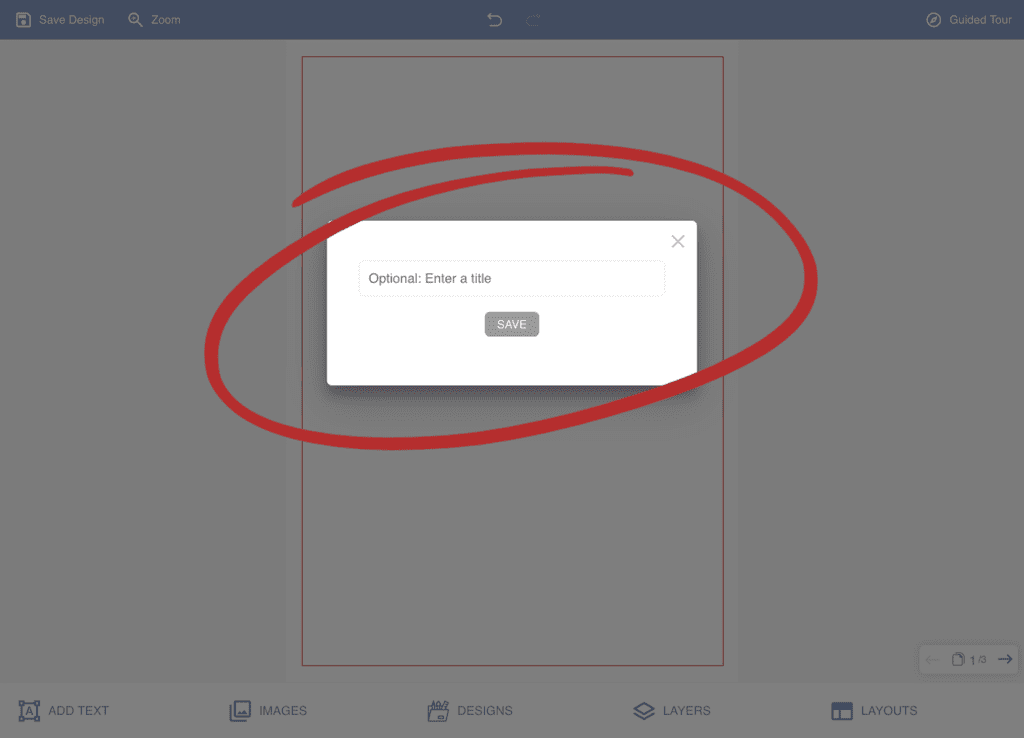
Once you have created an account you can save your design by clicking on the ‘Save Design’ option at the top left of the designer. You will then be prompted to name your saved design.
To revisit a design at a later time navigate to the ‘My Account‘ Page from the main menu at the top of any page and click on ‘Saved Designs’.
Finished Design
What To Do When You Have Finished Your Design
When you have finished your design we would recommend thoroughly checking each page to double-check everything is correct, including dates, times, places, and spelling.
When you are satisfied with your design choose the quantity you require from the dropdown box below the designer and click the ‘Add To Cart’ button. If you are ready to place your order you can then click on the “View Cart’ button at the top of the page.
If you have any questions or problems during the design process then please don’t hesitate to contact us.